Projectors deliver bright and clear picture, but to make it matter, you need to securely hang your projector screen at just the right height. You can choose to create your projector frames or you can purchase some frame kits from most hardware stores. But do you need to hire help to hang a projector screen or could you do it on your own? You would be surprised with how little effort you need to put into hanging projector screen without involving other people.
Before mounting it you’ll face many questions on the subject. What is the type of wall you’ll be hanging your projector screen on? Is it hard to hang projector screen from the ceiling? Which instruments do you need to secure the screen? These and many more questions will be answered in our article below, so you’d have the screen in place in no time.
For different projector screen types, you will need enough space on the wall. The screen size will determine where you will place your projector screen. For example, a smaller option will not be clear if placed in a high position whether on the wall or over the ceiling. However, a bigger screen will look way better and be more comfortable to watch.
So, before you choose the place for your projector, you could simply take picture of the wall it will hang on and draw guidelines with screen measurements. This will help you visualize the future viewing experience.
This can also help you choose the comfortable viewing angle, which usually is around 15-20 degrees for an average height user. The projector screen bottom should be around 24-36 inches above floor level depending on the eye level. If the projector screen is for presentations in the office, then it doesn’t need to be so high that it makes people’s necks uncomfortable.
Light is another thing to consider, the projector screen can be mounted on the wall that does not have direct light, otherwise, the light will interfere with the images of the projector screen. Or maybe you can splurge a little and use an ambient light rejecting screen.
For outdoors, it is wise to purchase projector screen with stand can withstand weather conditions and can securely stand on the ground. According to most reviews, the best projector screen for outdoors is the EasyGo Products 14′ Inflatable Mega Movie Screen, which, reflects enough light and is easy to assemble.
Make sure that you have the right tools: measuring tape, the drill, screwdriver, screws and stud sensor, preferably with auto leveling. If you own these reliable tools – you’re half way there. But if not – be sure to invest in a good cordless drill, that could take your walls thickness. As for the stud sensor, according to NYTimes article Trusted Source HOW IT WORKS; Detectors Can Find Just the Right Spot to Drive That Nail THE next time you need to hang a picture on your wall or install some shelves, you might rely on aesthetics alone to decide the placement. Of course, if you do that, you risk being awakened in the middle of the night by a loud crashing sound as your object falls from the wall under its own weight. www.nytimes.com it is an irreplaceable tool, that comes in handy in almost every house work. Many of such devices come with auto-leveling, like our favorite BLACK+DECKER BDL190S stud laser, which makes the job twice as easy. To hang projector screen from the ceiling you will also need a reliable telescopic ladder.
Also, remember to be careful at all times, use clothes that fit but won’t constrict your movements. Use safety googles and mask to avoid getting dust in your eyes and lungs. Have first aid kit at the reach of your hand. Lay thin fabrics or newspapers on the floor under the place you’re going to drill to ease up the cleaning process.
So, after you’ve taken all the measurement required, it is time to act. Below you’ll find thorough instructions on how to hang your projector screen on different wall and ceiling types.
Step 1
After you have chosen the best corner wall to mount your projector screen, use a stud sensor and drag it over the wall. It will detect framing studs behind the wall. Just mounting the screen anywhere can be quite dangerous in the future. Since the area could be weak and collapse.
Mark the stud areas with a pencil, the width between the studs corresponds to the measurement of the screen projector.
Step 2
Make sure the markings of the stud are in a straight line ready for mounting. You can use a laser level; this is to prevent the screen from being crooked.
Step 3
Take the mounting brackets for one side, use the drill to attach the brackets at the marked area in the stud wall. Repeat this step on the other side with the bracket. That way you have two straight fixed mounting brackets.
Step 4
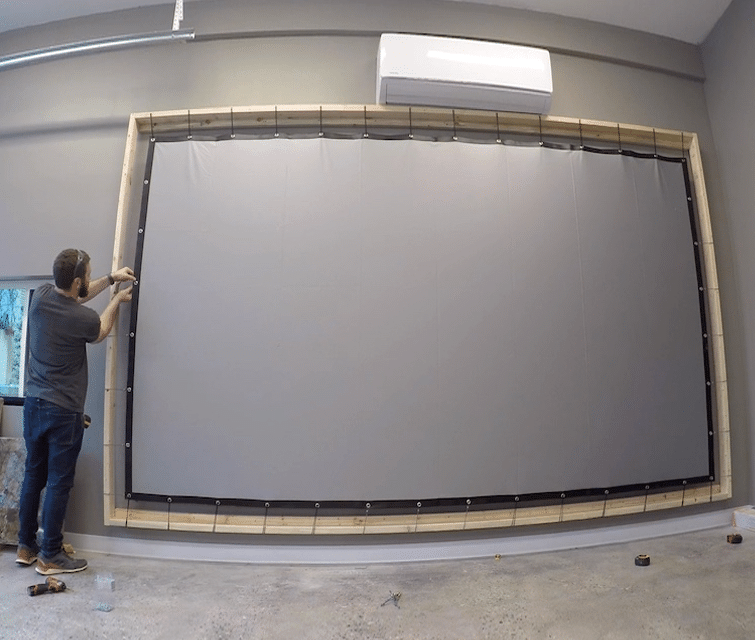
Mount the screen projector unto the mounting brackets and check for it to be securely placed. Do not try to force it down from the wall, always be as careful as possible.
Step 1
Identify the right area on your wall that you want to place your screen and mark it with your pencil. Use laser level to make sure the markings are parallel.
Step 2
Lay something on your floor for less clean up, Prepare the hammer drill and start drilling a hole on the marked area, but at low speed. Stop and blow the hole off the dust from time to time.
Step 3
Continue to drill but this time drill at medium speed until you can achieve the desired depth.
Step 4
Screw-in the hanging L-shaped brackets and secure the brackets in the concrete. The L-shaped brackets are good because you need the screen to be far away from the wall.
Step 5
Attach the projector screen to the hooks. Check everything to be safely secured.
For this one you will need to follow the steps from the instructions that fit your wall type, but necessarily use the L-brackets. Measure the distance between the wall and the TV, plus TV’s width. Your projector screen needs to be several inches farther than the screen, to not damage it.
You need to hang the screen using the ceiling joists, not the wall studs. The ceiling joists are beams that run from one end to another and support the ceiling of the house and can support a heavier load like the projector screen.
Step 1
Use tape to measure the width of your projector screen. This will correspond to the width between the mounting brackets on the ceiling.
Step 2
Use a ladder or a high stable tool to get close to the ceiling.
Step 3
Use the stud sensor/detector and run it over the ceiling to detect the ceiling joists. Mark with a pencil.
Step 4
Use a laser level to make sure that the markings are parallel and not crooked.
Step 5
Place the mounting brackets at the center of the ceiling joists, mark the exact areas with a pencil, this is where the screws will go into.
Step 6
Place the bracket to the stud and screw the mounting brackets in place.
Step 7
Place the projector screen in place.
Step 8
If after you place the projector screen on the ceiling, you realize that the screen projector is too high you can correct this by purchasing bracket extensions that way you can be able to lower the screen projector to the best height that you want.
This is best when you want to have a projector screen that is well hidden inside the ceiling and can only be taken out if in use.
Step 1
Take the measurements of the depth of the ceiling to make sure that the projector can be tucked inside and fit. This is the permanent slot for the projector screen in the ceiling. It should also be slightly larger than the plywood.
Step 2
Take the measurements of the mounting bracket and cut the plywood with exact measurements.
Step 3
Place the mounting brackets on the plywood then mark with a pencil.
Step 4
Use the drill to make holes in the plywood. Drive the threaded rods inside the wood
Step 5
Using a drill, attach the plywood to the joist in the ceiling. The joist is much safer as it can withstand the weight of the projector screen.
Step 6
Place the mounting bracket over the threaded rods and the small flat rings, which are also known as washers. Tighten the brackets in the joists using nuts
Step 7
Hang the projector screen from the mounting bracket, which can be moved towards the ceiling and the screen is closed inside.
You do not need to be good at masonry to be able to successfully mount your projector screens. You do not even need to have some type of training in carpentry. When setting up to hang the projector screen, no matter which method you choose, do not forget to consider factors like the size, height, and the light in the room.
Now you know how to hang a projector screen and how to do it without even breaking a sweat. With a few tools mentioned above, you can successfully mount any projector screen on a wall or from a ceiling.
We hope you’ll have the best time gaming or watching movies on your new projector that you’ve hanged on your own. And did it right!


