With all the fun that best projectors can bring us in a spare time, we admit that finding a perfectly fitting projector screen proves troublesome. You would need to consider a plethora of factors and might still end up adjusting your projector to get a decent image. And if you are lucky – you’ll get a clear picture, if you’re not – every time you start your projector, you’d have to go to settings.
Making a DIY projector screen ensures quality and proper resolution. But if you are unsure whether or not you’d have a proper skill – we will guide you through the process. You’ll learn how easy it is to smooth and paint wall, build a custom screen and even create a screen that can be easily used outside. All the calculations for your perfect projector screen and how to take them will take no time to make. And you would be surprised how easy it is to build the one projector screen that would be a perfect fit for home theater, gaming room or working space.
Preparations before making a DIY projector screen
The type of the screen will determine the materials you will use. You can build a curtain screen, a fixed screen, a painted screen, or a portable screen.
For instance, a wall projection (painted) screen might require just a fresh coat of paint. It is the cheapest and easiest DIY projector screen you can have. However, it is prone to imperfections such as low resolution. Even the slightest unevenness of the wall will distort parts of the image. This method, though cheap, requires more carefulness to get better results.
It would be best if you also considered the purpose of the projector screen. In this case, the procedure and materials needed for an outdoor screen will significantly differ from those of a home theater screen.
More also, you have to think about the “ Throw Distance Trusted Source Throw (projector) - Wikipedia In video projection terminology, throw is the distance between a video projector lens and the screen on which it shines. en.wikipedia.org “, which is the distance between your projector and the projected image. Throw distance is a crucial preparation aspect. You should get accurate figures because it affects the quality of the image “thrown” by the projector on your screen.
No need to be worried about calculations. You can access a throw distance calculator here Trusted Source epson-mobile files.support.epson.com . To guide you through it, here’s a helpful video:
After getting the projector screen distance, you now need to assemble the materials and tools. You will need:
∙ A power drill, like Makita XDT16Z
∙ wood glue
∙ wood drill
∙ a clamp
∙ speed square
∙ a staple gun
∙ felt tape/velvet tape
∙ fabric (curtain sheet)
∙ hanging line
∙ small paint roller
∙ a big bare wall
∙ clothespins
∙ pvc pipe or an outdoor projector screen stand tripod
∙ nails
∙ handsaw
∙ glue gun
∙ metal bars, screws, and canvas (for a metallic fixed projector screen)
∙ wooden boards
DIY projector screen paint
If you need a cost-effective DIY method, painting your wall is the best alternative. It will also save you time. However, you need enough space.
According to most reviews, the sturdiest model must be the high-definition screen paint from Digital Image which, thanks to its reinforced construction, is the most reliable option out there.
Interestingly, most people think that a white background is an excellent choice. But that is far from the truth. The best color is light-grey or white-grey. And if your projector produces over 3,500 lumens, you got a great combination.
However, if you have a high contrast projector, it combines well with a white wall. Nonetheless, the room should have minimal or no ambiance light similar to what we’ve had in traditional movie theaters.
And what about a DIY black projector screen?
Still, a black wall will not give you an optimal viewing experience in dark rooms.
You see, black is the absence of color or light. Thus, a black background will not reflect the images properly. They will appear dark or dull while we need crisp, clear images. Right? But if you have lots of ambient light in the room black – is your option. It can deliver higher contrast for all types of imagery.
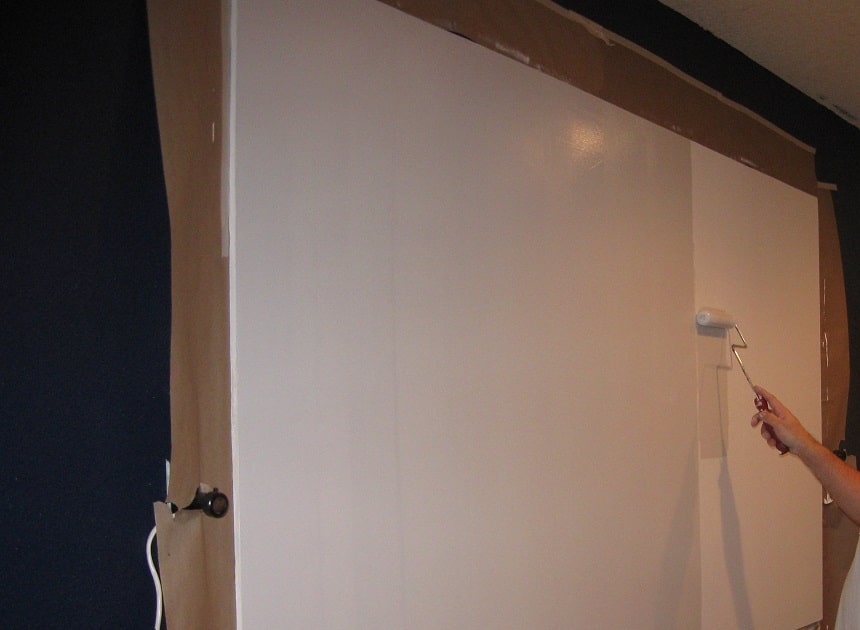
Upon confirming that the wall is super smooth and calculating your DIY projector screen distance, you can then embark on painting the wall.
DIY projector screen painting tips:
∙ Before painting, apply the primer and allow it to dry. It ensures that the paint adheres and lasts long.
∙ Be sure to tape off the screen borders for a perfect job.
∙ Paint the entire section of the wall. It helps get rid of imperfections, prevents the paint from dripping on the projection screen, and provides contrast.
∙ Use a small paint roller for an evenly painted surface and also to prevent the paint from dripping.
∙ If the need be, apply several coats for a smooth finish.
∙ If you would like to take your DIY task a notch higher, add a frame. Do this by simply using felt or velvet masking tape.
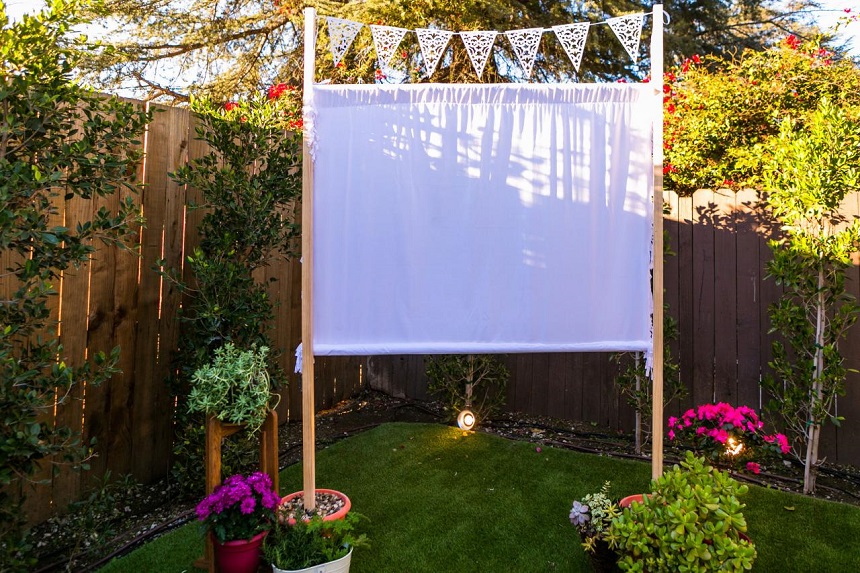
DIY projector screen fabric
You can also build a projector screen using fabric (curtain sheet). You can either use a white sheet, curtain backing, a white canvas, or black cloth, big enough to fit your ideal screen size.
According to most reviews, the sturdiest model must be the light rejecting DIY raw projector screen material from Elite Screen which, thanks to its reinforced construction, is the most reliable option out there.
Secondly, you need to hang your screen backdrop. A clothesline is the best option. It is easy to set up. Additionally, it is economical and can be used to make outdoor or indoor projection screens. Furthermore, you will not need to accurately calculate your projector screen distance – an estimate works just fine.
When working with blackout cloth, you will need to hold the panels in place using clothespins. Remember, we are still using the clothesline as the support system. For better image projections, fasten the panels on the clothesline and also get rid of any creases.
As earlier indicated, fabric projector screens are ideal for outdoor viewing. You only need to fold the fabric and transport it to the drive-in site. However, you need to reinforce your screen. To do this, attach a PVC pipe at the bottom to prevent the breeze from ruining your set-up.
An alternative to the PVC pipe is a screen stand. It should be of good quality, foldable, and light for easier transportation.
According to most reviews, the sturdiest model must be the outdoor projector screen stand tripod from Qoody Store, which, thanks to its reinforced construction, is the most reliable option out there.
A clothesline works just fine. But it looks cheap, which takes us to alternative – how you can make a fixed projector screen.
DIY projector screen frame
Although it is more complex and costly, a fixed screen beats other DIY projector screens in aesthetics and image quality.
Firstly, it looks like a huge curved or flat screen T.V. That would be an excellent addition to your media room. No? Secondly, it is sturdy and not prone to image imperfections or distortions.
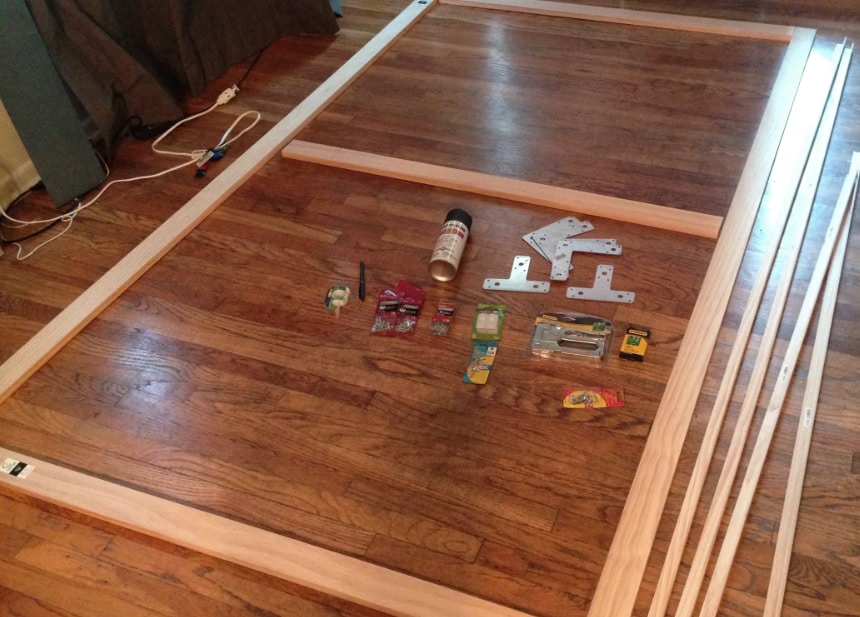
Here are general DIY steps for making your own projection screen:
Firstly, you will need enough wall space. Additionally, a big room is better so that you can have sufficient space for your throw distance. Remember, projectors come with different specifications. But we had already discussed projector screen distance. With that, you are good to go.
You will also need easy-to-stretch canvas and blackout cloth (it should be bigger than the screen size by five inches).
You can use wood, PVC, or metal to build the screen frame. However, the material you choose for the stand will determine how you will fix the projection screen.
Here is a summary:
Wood – Choosing wood gives you flexibility when designing and building your stand. It is also sturdy, thus making it the best choice. If you prefer a wooden frame, you will only need to lay it down then use nails, staples, or a glue gun to fasten your screen fabric. You might also need braces to support the weight.
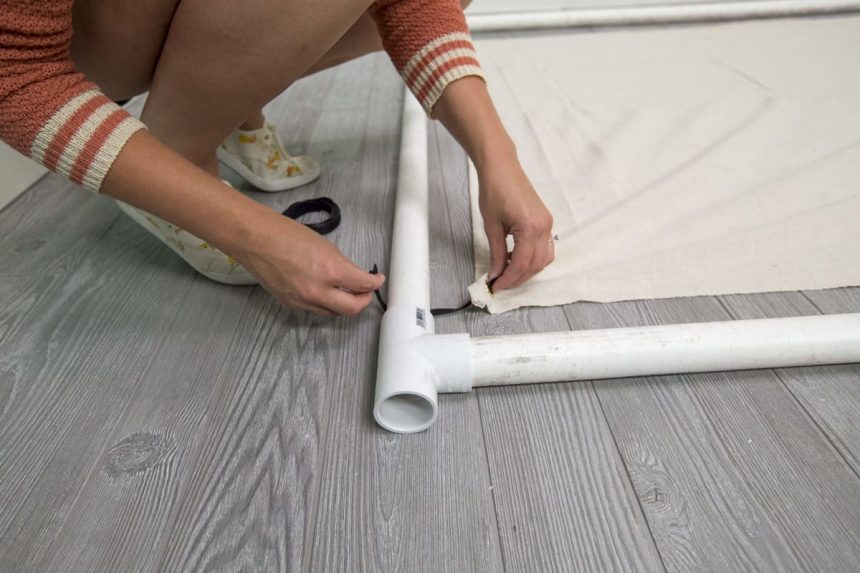
PVC – If you need a light stand, PVC will serve you well. It is sturdy easy to mount. But, it is not as flexible as wood. Working on a PVC frame requires you to either use a glue gun to keep the screen in place or sew the fabric on the edges.
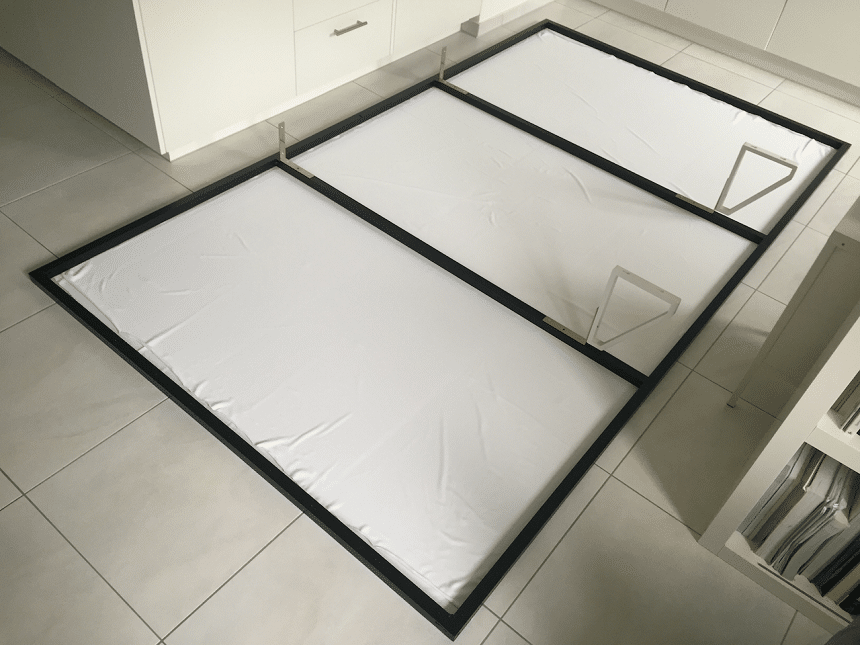
Metal – Though the heaviest, it is long-lasting. Furthermore, it is the least flexible, which hampers creativity when building your frame. To make your own projector screen using a metallic frame, you’ll first fasten the two flat bars using screws. You will also need to keep the screen fabric in place by having canvas in between the bars.
With your materials ready, start building your DIY projector screen while factoring in the throw distance. Also, the below tips will make the task relatively easy.
∙ Do not build the screen with the frame first. Instead, lay the screen on an even floor, then place your screen on it.
∙ Stitch the fabric when using a metallic or PVC frame and use staples for a wooden mount. Do not use many pins. Add more after testing your projector screen.
∙ Pull the screen continuously as you attach it to the frame. It helps get rid of wrinkles and creases.
∙ Test the projector screen by mounting it on the wall.
∙ If satisfied, add more stitches or staples and leave a 5″ gap between the stitches or staples.
Still, you can take your DIY project a notch higher. Have you thought about having a curved projection screen?
Well, let’s learn!
How to Make a Curved Projector Screen
We will be making a 1.2m tall screen.
You will need:
∙ 2 pc 4mm MDF sheets
∙ Drywall screws
∙ Bondo
∙ Sandpaper
∙ 1 liter primer
∙ 2 liters of S1500-N paint
Similar to the previous DIY procedures, you have to consider the throw away distance. Alternatively, you could just use half the room. It works just fine. For example, for a 4 by 4 room, you will need a radius of 2m.
Next, confirm that the projected images will fill the screen both vertically and horizontally. You can achieve this by mounting your projector up on the roof and running several tests on the wall. You will be drawing. An AutoCAD serves well. Have one on the go.
Procedure:
∙ Identify where you will place your projection screen and make marks on the wall. ∙ Resize the MDF sheets to 2.356m along the arch length.
∙ Bend the MDF sheets and place them on the wall (you might need an extra hand) ∙ Before fastening the MDDF sheets, confirm that all the sides are level to prevent the screen from sagging in the middle where it has no support.
∙ Fix the sheets on the wall.
∙ Ensure that the MDF sheets should meet in the middle of your screen.
∙ After mounting the screen, the next step is bonding and sanding. Again, consider getting some help.
∙ Add the first layer of paint and allow to dry before applying then the second one. That’s it! Your curved screen is ready for use.
DIY Outdoor Projector Screen
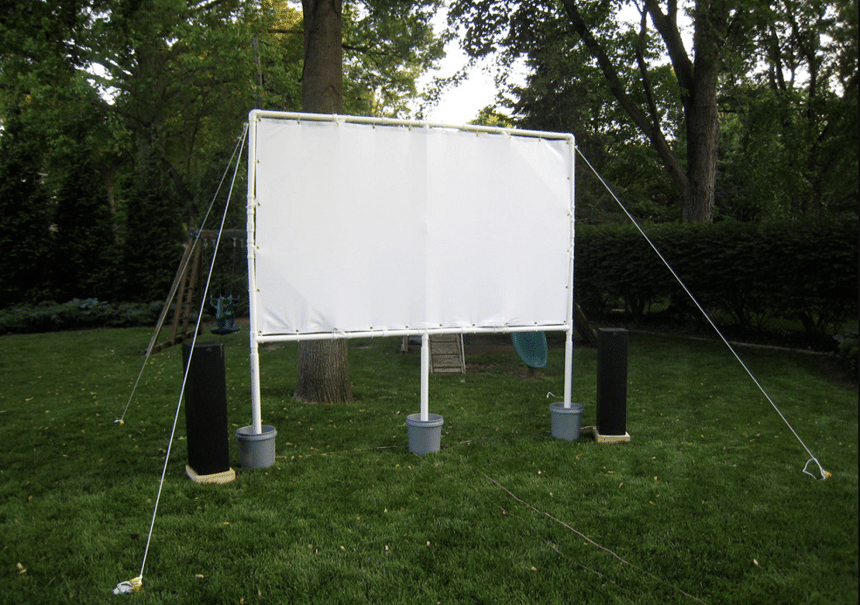
The bigger the screen, the better the viewing experience will be. Besides watching movies and playing games, you will also save money by eating home-made snacks.
For a 6′ tall by 10′ long screen, you will need:
∙ 4 x 2″ diameter PVC pipe cap
∙ 2 x 2″ diameter PVC 90-degree elbows
∙ 4 x 2″ diameter PVC 90-degree tee (with plain fittings for quicker assembly/disassembly) ∙ 2 x 10′ schedule 2″ diameter 40 PVC pipe
∙ 6 x 2″ diameter PVC straight couplers
∙ 12 x 2′ section 2″ diameter PVC pipe
∙ 1 PVC cement (or primer for stronger fit)
∙ 36 metal fabric snaps (with an anvil)
∙ 1 White King Size sheet (with no elastic at the top sheet) although Tyvek or Canvas is better as they don’t absorb water.
∙ 12-24 metal grommets, 1/2″ diameter or
∙ One-wrap Velcro (12 long pieces or 20′ roll)
∙ Tape measure/soft cloth fabric ruler
∙ Or bungee cord or any other strong cord
∙ Sharpie marker, sandpaper, rubber mallet, hammer, and drill with 1/4″ bit
∙ Tee square/framing square
Procedure:
The first step is to test-fit the PVC to ensure that they go in all the way for a firm stand. You will need to sand them down if they do not fit well. Also, some joints need to be left unglued for easier dissembling after watching or if you intend to move the projection screen.
Start by fixing and gluing together the pipe caps on 2″ sections. Then put the other end of the pipes into the 90-degree tee fitting with the curved section of the tee pointing up. Fasten them together using glue before adding the 2″ section to the upward pointed tee joint. Apply glue then allow to dry. You will also need to drill some drainage holes on the bottom of the screen stand legs. The holes should be 2 to 4 inches apart.
When using multiple 2″ sections and couplings, you will need to add three of them together then fix them using glue. Conversely, 8″ or 10″ sections will need you to cut them to 6″ and sand the edges until smooth.
Fit the 90-degree elbows to the top of your 6″ sections. Glue them in place and leave them to dry.
Using the mallet and one PVC pipe, set the legs 10″ apart. Do not glue the joints unless you want a permanent projection screen.
Next, put the other long 10″ section in the 90-degree elbows (this should be the top side of your side frame pipes). Do not glue them but use a rubber mallet to slam them together.
Lift up the side and top pipes to have the 6″ poles on the ground and the 10″ section vertically placed. Then hoist it up with the help of a friend to place the ends in the leg tee joints. Using you ladder, climb up and hammer the frame from the top.
You have just finished building the frame. Next, you need to work on the screen. Next, use your ruler and sharpie to mark 1″ increments along the edge of your sheet.
Measure 2″ in from the first marks. Then use the sharpie to add marks along the previous line of marks. Lastly, add more marks – approximately 10″ from the second line of marks. Then add snaps on each of the marks.
Drape your screen over the top bar of the frame, then snap all the snap ends together.
Next, gently stretch the screen (you might need an extra hand). Using the sharpie, make marks, which is where you will place the next set of snaps on the screen.
Once this is done, install the snaps along the marked locations.
Next, divide the sections between the inside set of the snaps into 6 equal parts. Make holes 1″ from the edge and assemble the grommets there. Then, use a knife to mark an X in the location and fix the grommet. Repeat for all the holes, and be sure to remove the screen fabric from each of the grommets.
Mount the screen on the frame. Next, wrap OneWrap once around the ropes, through the grommets, then back around itself.
Lastly, use the wraps to gently tighten the screen and scissors to shear the extra overhanging screen fabric at the back.
Done!
Get your projector and enjoy your hard work.
How to Upgrade Your Projector Screen
Having a modern projector is not enough. A good projector will always be as good as the projection screen. Unfortunately, most people are unaware of this fact. They end up overspending on the projector and underspending on the screen, which results in a poor viewing experience.
Upgrading your screen can include DIYing a new one using better materials. For instance, you can replace the outdoor bedsheet screen with high-quality fabric such as Tyvek. It does not absorb water; it lasts long and it is easy to move around, making it an excellent choice for the outdoors. Other alternatives include spandex, trapeze, and tarps.
Secondly, you can have an enhanced viewing experience by adding a frame to your projection screen. The type of material you choose depends on screen type and your preference. It can be good quality masking tape for a wall projection screen, wood, PVC, or metal for fabric screens.
The bigger the image, the better your viewing experience. You can upgrade your projector screen by getting a bigger one for an enhanced viewing experience. However, this option might not work if you are using a wall. The DIY procedure remains the same. You only need to fetch more materials to build a bigger screen.
Lastly, you can upgrade by having a DIY roll up projector screen. Since you use it when viewing and hide it when not in use, it is an excellent idea when you don’t have sufficient space. Furthermore, you can customize the screen to suit your needs, such as size. There is no need for installation, which saves time, and it is also easy to store.
Final Thoughts
Setting up a DIY projector screen is easy. Additionally, adequate preparation makes the procedure enjoyable. It means that you should assemble the materials and tools before starting – it makes you more efficient and gives you the motivation to finish.
When sourcing for materials, be sure to purchase from reliable vendors like those mentioned in this article. Inferior quality materials will give you a poor-quality projection screen and a poor viewing experience.
Furthermore, you don’t need to purchase all the tools. You can borrow some from friends and cut down on the overall DIY cost. After all, doing it yourself is supposed to help you save some bucks.
Although you can handle most of the steps alone, some DIY steps will require an extra hand. For example, fixing a curved projection screen is more manageable when someone helps you hold one end of the MDF sheets. So, why not fetch an extra pair of hands? With these instructions, you’ll be having a perfect DIY projector screen in no time.