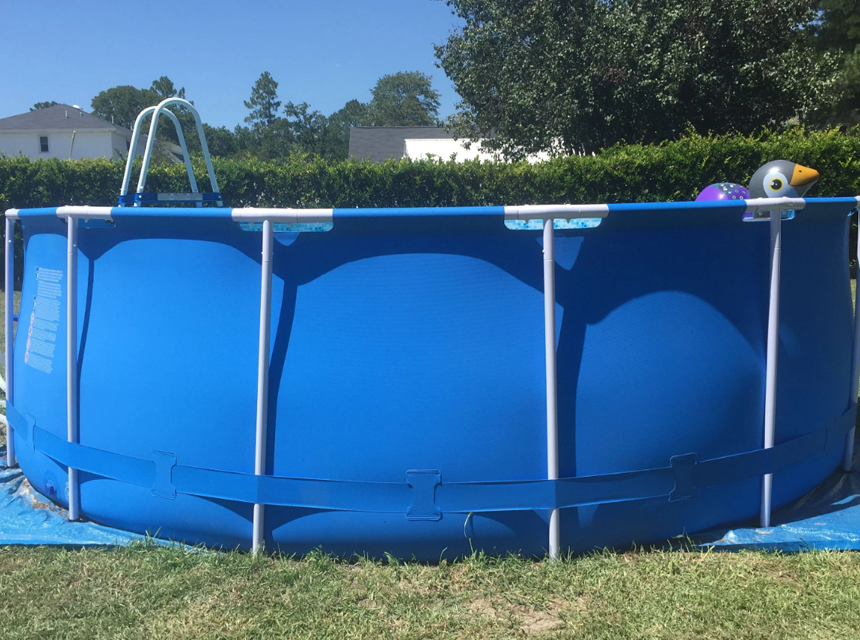
Nothing is as refreshing and relaxing as swimming in a pool when the weather is warm. But to maximize the benefits your pool offers, you need to keep the ground leveled, which explains why you need to know how to level ground for a pool.
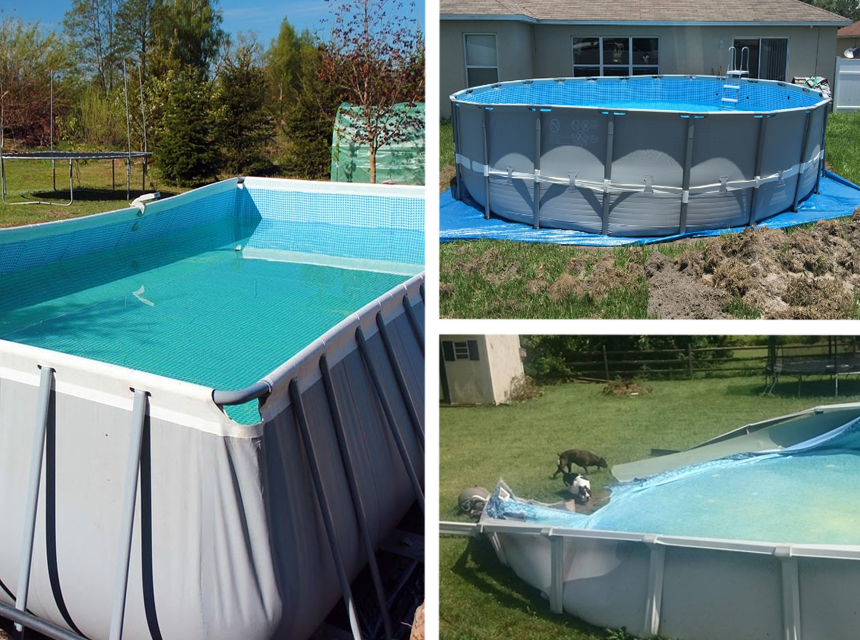
Although it requires some time and effort to install an above-ground pool because of the process involved, you would agree that it’s a worthwhile thing to do, given that it makes you relish last-minute summer bathing and enjoy a safe swimming experience.
These days, homeowners are more intentional about their backyards, and one of the things they do to make their home area more pleasing and safe is to install an above-ground pool. And when it comes to this, certain things must be carefully considered, which will, of course, be well-detailed in this article.
Why You Need a Level Ground for Your Pool
There’s a high chance that you’ve got an above-ground pool if you’re reading this article, and we guess that you’re curious about why you should level ground for your pool, even though you’ve been told that it’s helpful. Right? To erase your doubt and give you more clarity on why this activity is important, here are three significant reasons to level the ground for your pool.
Safety Purposes
To promote adequate safety, you must ensure that your pool isn’t on uneven ground. The danger of doing this is that it will make the water uneven, which means that the end will be shallow and deep. And consequently, this pool will not be safe for certain people, especially for kids who find it difficult to touch the bottom of the pool.
So, as a family man or someone who often has kids, you must know how to level ground for above ground pool.
Prevention of Damage to the Pool
Just as uneven ground can compromise the safety of children playing in your pool, it can also make your pool suffer great damage. Your pool’s structural integrity will start collapsing gradually if there’s an uneven distribution of your pool’s weight, and you should expect some breakings, twists, and buckles around the walls of your pool. Your garden can eventually get flooded when this pressure becomes too overbearing for the pool. In this case you might want to consider the best above-ground pool liners to get a durable decorative pool liner.
Aesthetics Purpose
Although this may be the last thing you have to worry about, there’s absolutely nothing wrong with having your pool look so beautiful, neat, and structurally balanced. A leveled pool will always be satisfying and attractive and will make your garden more aesthetically appealing to people.
Before You Start
Whether you want to know how to level ground for an inflatable pool, be versed on how to level the ground for an intex pool, or level ground for whatever kind of pool you have, there are certain things you must put in place to make the task quicker and easier.
Foremost, it’s very crucial that you carefully read the instructions provided by the manufacturer of the pool. The essence of this is to ensure that you’re aware of the necessary recommendations highlighted to help you make your installation hassle-free. Next, you have to ensure that you have all the needed tools and equipment available to make the task go smoothly.
So, what tools and equipment will you need?
- Sod cutter: Although this equipment can be a bit uneasy to use, it will come in handy in clearing glass and ensuring the neatness of your selected area. However, you may want to look at getting a rototiller if your budget can accommodate the expenses.
- Wide shovel: This wide shovel is what you’ll be using to remove roots, debris, and rocks that have the potential of damaging the pool liner. It will also prove very useful for digging into bumps.
- A long wooden board and a leveling device: To ensure that all the pool areas are leveled, you’ll need this equipment. It will help to smoothen and flatten your pool site’s areas and ensure good evenness.
- Wide rake: This tool will also help to complement the smoothing and leveling of your pool site.
- Rolling tamper: You’ll need this tool for sand compression on your pool site. However, if you do not have a rolling tamper, a lawn roller is a credible alternative you can oblige to.
Other items, tools, or equipment that will also be useful for this task include a hose, sub-base material such as sand, spray paint, string, a wheelbarrow, tape measure, stakes to mark the ground, and a level.
Step-by-step Process to Level Ground for a Pool
Step 1: Choose the Right Spot
You’ll need a location or a spot to mount your pool. However, you wouldn’t want to be too carefree about where you choose to install your pool, and you need to ensure that you’re selecting the perfect spot. Now, the issue is, how do you know which area is perfect for mounting your pool? Here are a few tips to guide you in choosing the right spot.
- Bumpy and flat ground: Avoid setting up your pool on the bumpy ground in your backyard, and if you have a very flat area in your backyard, that should be your number one spot to consider for your pool.
The flattest spot in your yard will make the process of your pool installation easy, even though there would still be a need to do some shoveling to level the ground properly for your pool.
- Underground structures: Septic lines and sewage should be avoided when you’re choosing the spot for your pool. And for safety purposes, don’t forget to look out for underground power lines and cables and ensure that the spot you choose doesn’t have any of those.
- Shade: You would agree that it can be quite cool to have a little shade around a pool, but what about the maintenance? Would you love to constantly see your pool littered with dirt and dropped leaves from trees? Think of that.
- Space factor: Consider the space factor based on what you fancy. Most times, it’s best that the spot you choose isn’t too far from your property so that you can enjoy easy access without unnecessary long walks. Especially on summer days when the temperature can be quite high, you can quickly step into your pool to enjoy soothing comfort without walking too far.
Step 2: Clear the Pool Site
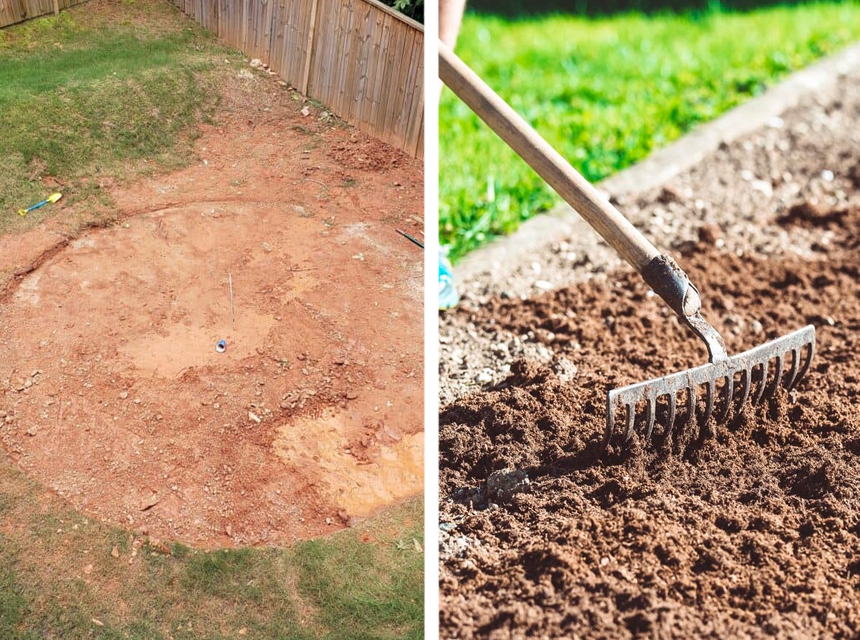
Swimming is undoubtedly an excellent all-around exercise, but even as intriguing as it is, nobody wants to swim in a messy area that is not only unappealing but unhealthy. As soon as you’re done with the selection of your pool’s location, you must get into the act of clearing the site and removing all found obstacles.
Take note that even if you plan to set up your pool in the flattest area in your backyard, you can make the pool vulnerable to getting damaged if you don’t first clear the site. Everything from the grass to the roots, rocks, debris and other harmful or unhealthy stuff should be thoroughly cleared. You may have to invest in a robotiller to ensure that this is adequately done, and there’s also the option of using a thick tarp to kill the grass.
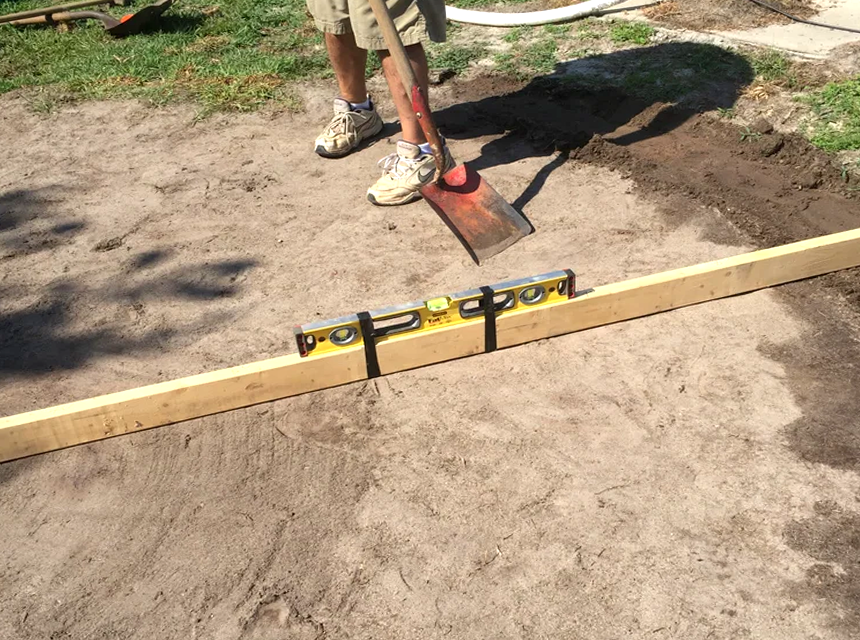
Step 3: Use Leveling Tools
After you’ve secured your spot and you’ve cleared the site, then it’s time to get into the leveling action. It’s important that you give thoughtful thoughts to this activity because we’re speaking of hundreds and possibly thousands of gallons of water, and you shouldn’t underemphasize anything.
You’ll need to be aware of your pool site’s low and high points with the leveling tools with you. Your knowledge of how to level ground for a pool with string will prove very useful, but this isn’t something too big to handle.
All you need to do is to ensure the complete flatness of the ground by using the level along the string. You can also be sure of the proper flatness of the ground by using the best rotary laser levels and placing a wooden plank on the ground.
Step 4: Get rid of Bumps
The previous step of leveling will take you to this step, where you have to flatten bumps. As you level, you will see certain highlighted areas that must be worked on.
Although it can be quite painstaking, it’s better to face the pain of leveling the bumps and enjoy the gain later when it’s all perfectly done. Rather than just trying to fill a lower area, your pool will have a better, stable, and well-structured base if you flatten the bumps by digging into raised levels.
Step 5: Compress the Soil
Experts believe that knowing how to level ground for a pool with sand will make you open to a more standard and secure way to level ground for your pool instead of seeking an alternative that helps you learn how to level ground without sand.
And arriving at this stage, you cannot avoid the usage of sand. You need to solidify the base of your pool by compressing the soil. If you have a garden hose, use it to spray water gently on the soil for not more than 60 minutes. After that, without being in a haste, carefully compress the soil by running the whole surface with a lawn roller or a rolling tamper.
Step 6: Smoothen Your Sand
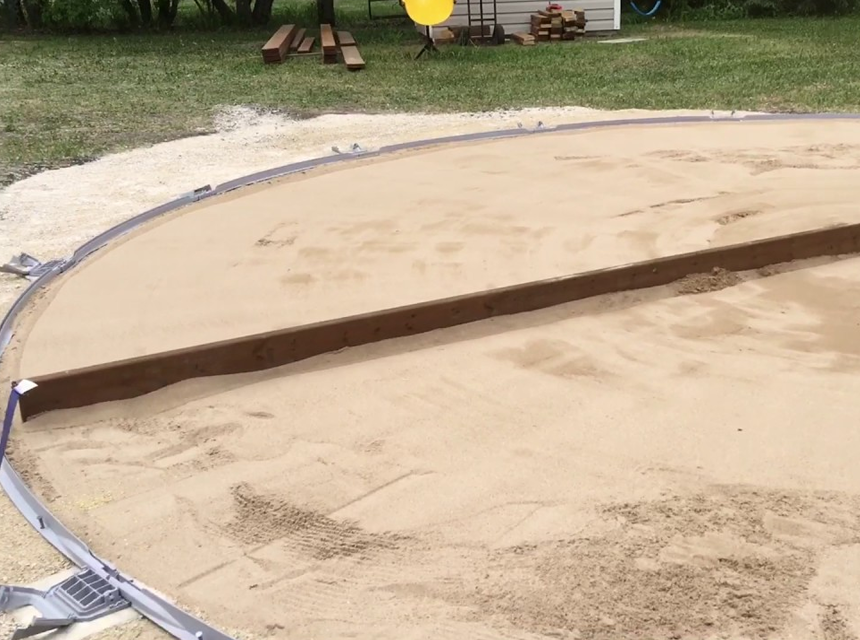
Laying a solid first layer is next after you’re done with the leveling and flattening. Creating a smooth sand base requires lots of mason sand.
You can visit a close-by local landscaping supplier, a local garden center, or a pool retail store to purchase the right quantity of mason sand needed. This mason sand will help to provide further protection.
Step 7: Apply Treatment
The pool area has undergone many modifications and constructions here and there, and it wouldn’t be hygienic to leave everything there. Now, it’s time to apply treatment to the pool area to be a healthy space.
The areas of the pool can be sprayed with toxic-free herbicides. You can also stop fungi growth by applying environmental-friendly fungicides to the pool environment. However, don’t be too rushy with installing the pool. Let the chemicals settle for maybe 14 days before you proceed with the installation.
Step 8: Getting set for the Pool Installation
After the two weeks have elapsed and it’s now fitting to proceed with the pool installation, you still shouldn’t set up the pool without first laying the base protector.
If you don’t want to waste all your hard work so far, you must ensure that you put this extra protection layer in place. While a tarp can serve this purpose, a purpose-built pool pad will do just fine and even better. The essence of this base protector is to keep the water cool by providing an additional layer of insulation and also preventing damage to the wall of the pool.
Step 9: Install
This is the final step. Install. As this is the final step that wraps up everything, you would want to be careful enough not to ruin your efforts so far. So, consult and follow the manufacturer’s instructions before setting up your pool.
Kindly note that the proper knowledge of how to level the yard for the above ground pool will help to ensure that your pool is safe and looks very nice, and this is why it’s important that you follow these enumerated steps carefully.

Level the Ground For Your Pool Without Digging
The steps above will effectively serve those who wouldn’t mind going through the stress of digging to level the ground for their pool. But for those who prefer to learn how to level ground for a pool without digging, renting, or purchasing any digging equipment, here are three methods that also work.
Crushed Rock
This method is top on this list because it helps make a strong foundation. Though it’s made of rock, it’s not rocky if properly done.
For this method, you need fine crushed stone, which is the best kind of rock to use. For an alternative, you can also go for limestone. To commence this process, you’ll need to start by tamping the dirt to ensure that the base for your pool is pretty strong.
After that, you’ll be laying down a layer of crushed stone but make sure you flatten it according to the level. And lastly, you’ll need extra tamping to ensure that there are no jagged edges.
Land Grading
You don’t have to use any crushed rock this time around. By grading the land, you can save yourself from the hassle of digging. Although, most people who know how to level ground for pool on a slope would find this method to be more stressful because of the level of attention it demands.
But as many do not fancy the sight of crushed rock in their yard, your big pile of dirt will come in handy for you in this case.
This method is all about making the dirt strong without the addition of any materials of any kind. You’ll first start by raking to ensure that the pool area is free of debris, then you’ll proceed to tamp the dirt or even add more dirt if needed. After that, you have to make the soil to be compact by watering and rolling the ground, and finally, you tamp again and then proceed to lay to your pool.
Masonry Sand
This is the last method on the list. It’s also very similar to the crushed rock method but what makes it different is that you use sand, in this case, instead of rocks. To commence the process, you’ll start by tamping the dirt. Afterwards, add masonry sand. It’s very important that you use masonry sand and not sandbox sand for the sake of solidity and better structure.
Although no stringent requirements are needed for the quantity of sand to be used for round above-ground pools, it’s advised to use 5 tons of sand for a 24’ diameter round pool and 3 tons for a 15’ diameter round pool.
Extra Method: Using a Rope
Knowing how to level the ground for a pool temporarily can be interesting but what’s more interesting is using a creative method to level the ground for your pool. And this is where this rope method comes in.
It functions by getting a rope connected with a longboard and sand. To start the process, you need a standard piece of rebar and a piece of two-by-four twelve feet long. Get duct tape to get a level attached to the board. The two-by-four needs a large hole before it can be positioned on the rebar, which will help to flatten the sand.
FAQ
Here are frequently asked questions about leveling ground for a pool:
Can you put an above-ground pool on the grass?
The weight of the pool and the water can cause damage to the blades of the artificial grass if you proceed with this, and for this reason, you must put enough consideration if you must proceed.
How do you know if the ground is level for the pool?
With the combination of a long wooden board and a leveling device, you’ll be able to confirm the flatness of your ground.
What is the best method to follow to the level ground without digging?
We don’t believe there’s a “best” method to follow if you want to go for the non-digging method. It’s left for you to choose the particular method that works for you based on your preference and available resources.
Final thoughts
Choosing to level the ground yourself can be quite an arduous process, and this is why we recommend that you take it slowly and don’t be too hasty about it.
While it’s not a gainsay that leveling ground for a pool can be quite a daunting task, which explains why most people prefer to seek the service of a professional, you should have nothing to worry about if you follow the mentioned steps carefully.
And, if you don’t want to go through the stress of digging, you can oblige to one of the methods that don’t require digging. All-in-all, the knowledge of how to level ground for a pool will help to guarantee the safety of you and your loved ones around your pool and also make your swimming experience more pleasurable.