As powered circular saws and chainsaws take over the modern workshop, veteran woodworkers still pride themselves on the magical touch of a handsaw. They remain relevant even among the younger generations, although many of them need a lesson on two on how to sharpen hand saws properly.
For veteran woodworkers, cutting wood with a handsaw is calming and therapeutic. However, there is nothing therapeutic about a handsaw with crooked, blunt teeth. Those are less fun to use than walking with sand in your boots.
Luckily, there is very little wrong with your hand saw that a good set of triangular files and saw sets can’t fix; that’s the enduring beauty of hand tools. Plus, sharpening hand saws is an art that feels even more therapeutic when done with patience.
How Often Should You Sharpen Your Hand Saw?
Practically speaking, you should sharpen your saw as soon as you feel that it needs it. After a few days of using a saw, you can tell when it gets blunt because it starts to make a chattery noise instead of a constant buzz. It also takes more effort to cut the wood.
There are also several factors that come into play when determining the frequency of sharpening your hand saw.
- Softer, lower quality saws need more frequent sharpening, as much as once a week with frequent use
- You need to learn how to sharpen old hand saws, as these require a little more tender love and care. In general, make sure to pay attention to teeth setting during periods of hard use
- If you only use your hand saw rarely, a light touch-up every few months is all you need
- Sometimes, you don’t even need to sharpen your saw as much as just set it properly
When you use your compact circular saw for the more aggressive cutting, you will likely only need to sharpen your hand saws every few years. Any woodworking veteran would tell you: sharpen your saw only as often as you need to. Just learn to listen to your saw and it will tell you when it needs the file.
What You’ll Need to Sharpen a Hand Saw
The process of sharpening a hand saw requires a few specialty tools. Any serious woodworking shop will have these already, and even a hobbyist can pick these up for cheap.
Having the right tools is critical because it allows you to deal with the geometric positioning and shape of the saw’s teeth. If you’re not familiar with that, Renaissance Woodworker Trusted Source Understanding Saw Tooth Geometry | The Renaissance Woodworker Understanding Saw Tooth Geometry. www.renaissancewoodworker.com has a handy guide to get you started.
1. Saw sharpening vise
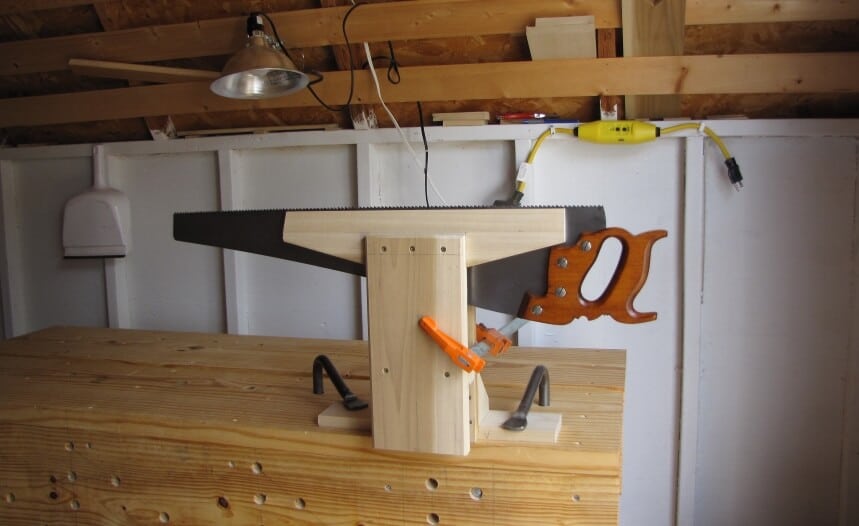 A saw blade is designed to be flexible, which creates vibrations when sharpening. A special saw vise clamps the blade into place to minimize this vibration and help the file bite firmly into the teeth.
While there aren’t many special-purpose saw vises today, you can pick up or make wooden attachments for a common vise. These fit into the jaws on your bench vise and serve to hold the saw in place. Even a set of 2”x4”s can do the job if you have nothing else.
2. Saw jointer
Not many woodworkers have seen these in person, mainly because they aren’t really necessary. A saw jointer is simply a handheld device into which you can clamp a stone or a mill file and use it to safely joint your saw.
Jointing a hand saw is the process of bringing all the teeth to the same height. By running the jointer (or a mill file if without a jointer) horizontally a few times from toe to heel, you scrape off the taller teeth and even them out. It gives you a flat surface from which to sharpen the teeth afresh.
3. Triangular files
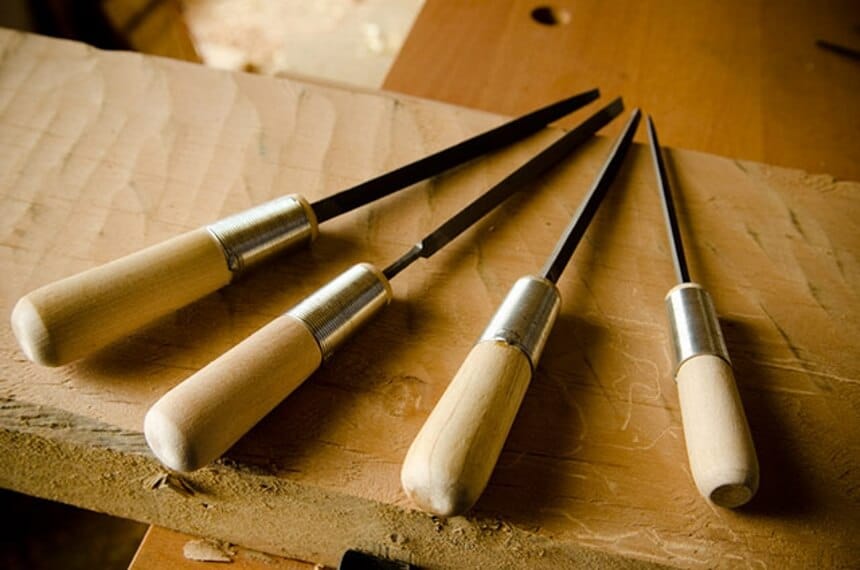 A set of triangular files are used to sharpen hand saws. For a common Western hand saw, a 600 file corresponding to the size of teeth on your saw is all you need. There are many types, sizes, and designs of triangular files for sharpening saws, and they are usually ranked by the number and taper of teeth on the corresponding saw.
What is important is to pick up high-quality files. These tend to be hardened and better cut for a fine sharpening quality than the cheaper Chinese versions. One kind of the good quality files is this 5-piece set of taper saw files. Made in Portugal and hardened with chromium alloy steel, they are the perfect long-life set of hand saw files.
4. Saw set
A saw set is a tool that looks like pliers used to bend each tooth slightly to fit the required sideways inclination. This angle provides the teeth some clearance to ensure that the saw blade does not jam into your workpiece when sawing.
The saw set has a small anvil and tiny hammer which you can use to individually set each tooth. If you don’t have a saw set already, you can probably pick one up at an antique shop or order this pliers-type zinc/copper alloy saw set. It is a very affordable set with adjustable set up to 15 tpi with an attached magnifying glass. It is one of the easiest to use by far and will probably outlive you.
5. Mill file
A single-cut mill file is one of the most versatile hand files used for aggressive filing. In this case, you will use it for jointing your saw together with the saw jointer.
6. Proper lighting and magnification
Good lighting is essential when sharpening your saw. You need to see every little detail on the saw’s teeth when sharpening to ensure you get it right. The outdoors on a clear day is good enough most of the time. In fact, good lighting helps to contract your pupils and give you sharper focus to see the little teeth.
It’s also a good idea to get some magnification for even better vision. A pair of drugstore reading glasses with 1.5x-4x magnification works just fine, or you can go the premium way and get a magnifying lamp for best detail.
Types of Hand Saw Teeth
 Hand saws have two basic types of teeth. The type of teeth determine the sharpening method, which is especially important when learning how to sharpen old hand saws.
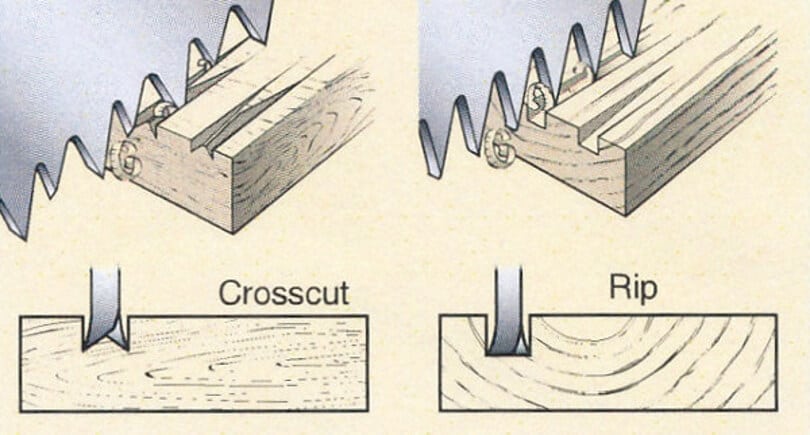
Cross-cut Teeth
A saw with crosscut teeth is one designed to crosscut wood, or cut across the grain. This type of cutting is more difficult, so these teeth are shaped like a series of tiny knives that sever the wood’s fibers.
To achieve this knife-edge, crosscut teeth are sharpened at an angle to the cutting plane. This angle is called the fleam angle, which is how you sharpen panel hand saws. Most circular saws use this kind of cutting as well.
Rip Cut Teeth
Ripping is cutting along the grain of wood. Thus, rip-cut teeth are designed to cut along the grain by chiseling out pieces of the wood. They are sharpened at right angles to the cutting plane, which means they “rip” through the wood fiber. That’s possible because rip cutting is easier than crosscutting.
Choosing the Best Sharpening File
When choosing a sharpening file, what you need to worry about is the size of the triangular file you have compared to the saw’s gullet – that’s the V-shaped space between the teeth. The saw should fit easily between the teeth with no extra space or overlap.
Triangular files are defined by taper, fineness, type of cut, length, and width. The important factor here is the number of teeth per inch (TPI) on the saw, which defines the size of its teeth and thus the size and taper of the file you need to use. Here is a handy guide.
| Type of File | Teeth Per Inch (TPI) on the Saw |
| 8-inch regular taper | 3 to 4.5 |
| 6-inch regular taper | 5 to 5.5 |
| 7-inch slim taper | 6 to 7 |
| 6-inch slim taper | 8 |
| 6-inch extra-slim taper | 9 to 10 |
| 6-inch 2x slim taper | 11 to 13 |
| 4-inch 2x slim taper | 13 to 20 |
Sharpening Hand Saws: General Process
By this point, you have probably already mounted your saw on the vice and jointed it. These are pretty straight-forward processes.
Setting the teeth is also easy once you have the right saw set. All you have to do is start from the saw’s heel and bend every other tooth away from you. After that, turn the saw around and set every tooth you skipped. If the teeth are overset (too inclined), you can press them in between the jaws of the bench vice and do the setting afresh.
If you’re wondering how to sharpen old hand saws, always start with jointing and setting. After that, your saw is ready for sharpening, for which you will proceed differently depending on the type of your saw.
How to Sharpen Hand Saws With Crosscut Teeth
-
- Due to the angle of the teeth on a crosscut saw, the triangular file is positioned horizontally at an angle of about 600. You will notice that the teeth are staggered with some pointing towards you and some away. If you need a guide on how to position your file, you can draw lines on the wood supporting the say blade at 600, as guided by a protractor
- Always file the teeth facing away from you, applying about 3 pounds of force only on the forward motion. The filing motion simultaneously sharpens the back and front of the two teeth in front and behind the file, essentially forming a wedge shape.
- Make one or more passes until the previous flat top of each top caused by jointing is just transformed into a sharp ridge. If you have a protractor, the final fleam angle from the perpendicular should be about 150-250.
- Turn the saw around and file the gullets you skipped on the first pass
- Test the teeth and repeat the setting and sharpening until you are satisfied
- Stone the file. This process removes the burrs from the filing from the sides of the teeth. Using a fine India stone or a #600 grit diamond stone, lightly run the stone along the side of the saw on each side. This process is also called side jointing.
How to Sharpen Panel Hand Saws With Rip Cut Teeth
-
- Rip saws have a very small fleam angle, or none at all. That means you should position the triangular saw horizontally and perpendicularly to the blade.
- Find the first set of teeth that points away from you and place the saw in their gullet.
- As will the crosscut saw, file on the forward motion only, making about three passes or until the flat surface at the top of the teeth is gone. Apply long and even strokes with about 3 pounds of pressure on each one
- Flip the saw to the other side and file along the gullets you skipped on the first pass. In this position, they too should be facing away from you. However, rip saws also allow you to file all the teeth from one direction if there is no fleam angle
- Test how your saw cuts and adjust the set or sharpen again as required, until you feel satisfied by the cut
- Stone the sides of the teeth as described above to remove the burrs and even out the set.
Final Thoughts
Sharpening a hand saw is part of regular maintenance procedures. You should also oil the blade and store it correctly to ensure that it keeps the edge for far longer. Between crosscut and rip saws, your sharpening process will determine how much easier and faster you can cut through the wood for your next project.
There are many more nuances that go into sharpening. For example, you might want to shape the teeth and give them a little more rake angle for easy cutting. However, you will pick those up with a little practice. For now, all you need to pick up the right tools and get to sharpening your hand saws like a pro.