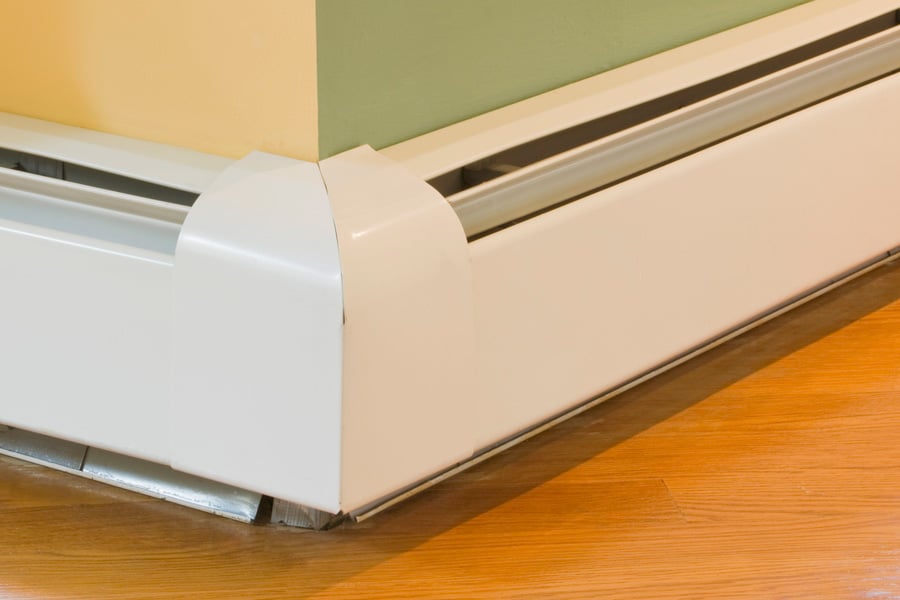
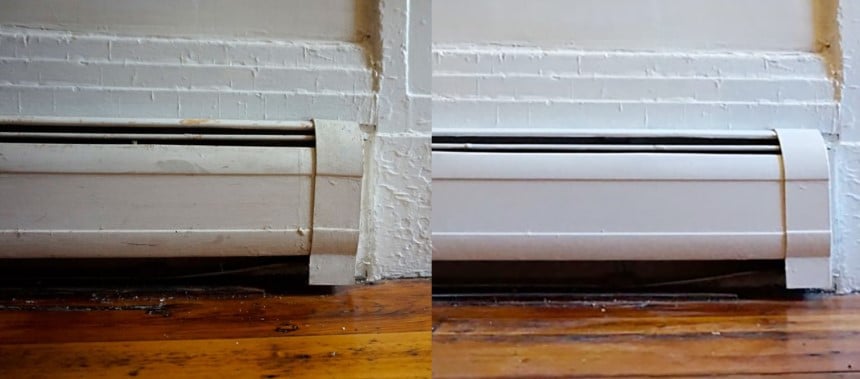
If your baseboards need an update, then an easy way to update them is by painting them. There is no need to pay lots of money to replace them when a simple DIY paint job can breathe new life into them. Painting baseboard heaters will help hide any imperfections and update the look of your home.
Paint them in a unique design to help them stand out or match your décor. Another option is painting them in natural tones to help them blend into the background. Treating the baseboard heaters with rust-inhibiting paint will help keep them in tip-top shape for many years to come.
The DIY process should take you around two hours to complete, so what are you waiting for? Read ahead, take a trip to the hardware store, and get started. All the tools you require shouldn’t cost more than $30. If you’re not a fan of DIY, you could always hire a professional for assistance.
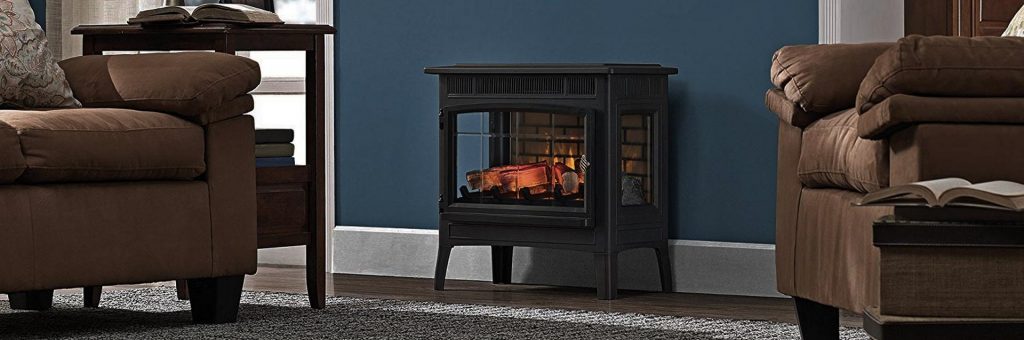
Still wondering which heather you’ll use in your home? Heating a large room can be challenging and expensive, especially if you use the wrong heater. Finding the best heater means that you need to get the most efficient solution that gives your home that cozy feeling without emptying your wallet. Here are 9 of the best heaters for heating larger rooms. Now, let’s get that heater looking smashing.
Painting baseboard heaters
Metal baseboard heaters may look unsightly, but did you know they can be painted? There isn’t any need to keep them that ugly grey color. Painting them will bring new life to your baseboard heaters. Paint them to match the design of your home or match them to the wall color for a more discreet look. Picking a neutral paint color for both walls and trim Trusted Source The right whites: Picking neutral paint colors for both walls and trim - The Washington Post “White on white when done right can be one of the most beautiful and versatile paint color combinations,” says Washington designer Kiera Kushlan. But for the untrained eye, picking out a good white out of hundreds of choices is a tough-enough task. Coordinating a perfect trim color to go with it can be even more challenging. houseandbeyond.org . Painting accents in your house Trusted Source Easy paint makeovers in your home - CNN If the paint is peeling or uneven as a result of multiple coats, give the entire surface a light once-over with 100-grit sandpaper to smooth rough edges and create a uniform surface. If the old paint is in good condition, with no flaking or bumps, use 220-grit sandpaper to rough up the smooth finish a bit so the new paint will stick. Vacuum up all the residual grit, or wipe it off with a clean cloth. houseandbeyond.org can embellish an existing design scheme with fresh colors or give the space an updated look and feel.
They don’t get very hot, but it’s still recommended to apply a metal primer before any kind of paint. Using oil-based alkyd paint is the best option.
Cleaning your water heater is very important. For one thing, it will last for much longer. Have a look at this interesting guide for more information.
Tools
The materials you require are the following:
- Clean cloths
- Cleaning bucket
- Degreasing cleaner
- Steel wool
- Fine-grit sandpaper
- Paintbrushes
- Wire brush
- Painting tape
- Metal primer
- Metal paint
- Gloves
- Safety mask
- Table or sawhorses
Preparation
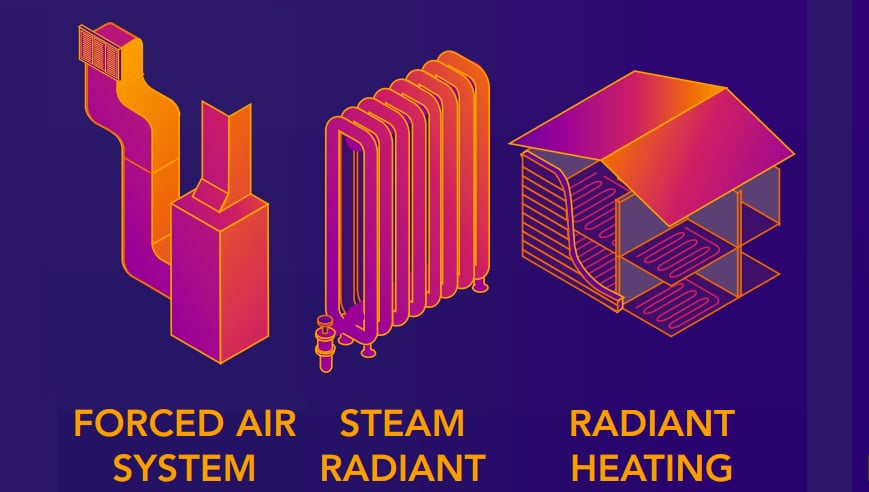
The first thing you need to do is identify the type of baseboard you have. There are mainly two different types, either electric or forced. If you don’t know which type you have, the easiest way to identify it is to check the power supply. The electric version will include a fuse box, while the forced version requires an oil or gas-fired boiler. Here are the 6 most common types of heating systems and how they operate.
The central heating system is the preferred choice and can be found in most houses. It circulates heat through a heat transfer process. Heating systems that can be found in this category include boilers, furnaces, radiant heating, and air warmers.
Another popular option is the electric heating system. It’s suitable for people who don’t have access to natural gas or fuel. Baseboard heaters are one of the common options for electrical heating systems. The only downside to this heating solution is the high consumption of electricity.
If you have the electric version, first switch off the power supply to prevent the risk of being shocked.
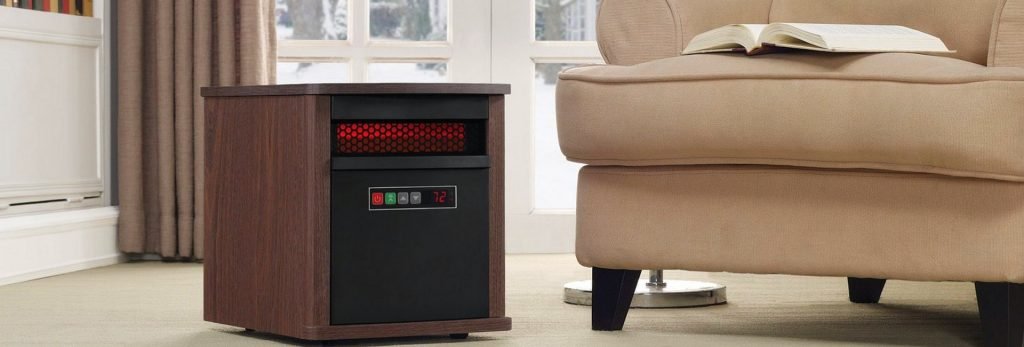
Infrared heaters have grown in popularity lately, and it’s easy to see why so many people are looking for alternative heating solutions. These heaters take the prize when it comes to safety, are exceptionally easy to use, and are just as efficient as pellet stoves.
Infrared heaters make use of a different type of technology than most other heaters. Another selling point is that they don’t dry out the air or move dust around. They are cheaper to run as they use a lot less power to work. There are so many amazing options to select between, each with a few pros and cons to consider.
A great product because of its quick-drying ability is Rustins – quick dry radiator enamel paint. It’s perfect for radiators or other items that heat up. Another great option recommended by experts is POR-15 high-temperature heat-resistant paint. It can be used on manifolds, exhausts, stacks and can withstand temperatures of up to 1200°F.
If you need to paint an electric heater, only use appliance epoxy. Don’t use latex or oil-based paints because it could increase the risk of a fire starting. Don’t paint gas-powered or portable space heaters for the same reason.
Steps
Follow these simple steps to paint your baseboard heaters in the correct manner. Make sure that you read them carefully before you start, and always remember to be safety conscious.
- Disconnect the power source from the heater. Pull off the end caps and secure the cover to the heater element. Pull the cover out to remove it from the heater element.
- Take it outside and work on a flat surface or table.
- Prepare the surface. Use steel wool and sandpaper to remove any rust or debris. The surface should be completely smooth after sufficient sanding.
- Use the bucket of water and a clean cloth to clean the entire surface. The surface must be leveled and clean before the next step. Apply painters’ tape around the area you will be painting.
- Mask the wall and baseboard around the heater element using painter’s tape.
- Apply a metal primer and evenly coat the surface. Be careful not to apply more than two coats. Let each coat dry before moving on to the next one.
- Choose your color and apply a thin layer of paint. Apply at least two coats, letting each one dry before painting the next layer.
- Once the paint is dry, touch up as necessary.
Safety tips
Safety is very important, and special precautions should be taken before attempting any DIY projects. Ensure the area you’re working in is well ventilated and wear the proper safety equipment. Other safety tips are as follows:
- If you’re using Latex-based paint, use hot soapy water to remove the excess. Latex is a much easier material to remove.
- Oil-based paints can be removed by using paint thinners.
- While sanding, be sure to use the proper safety procedures. Wear gloves, a mask, and paint in a well-ventilated area.
- Keep the primer paintbrush in a sealed bag. This will prevent the brush from being exposed to the air.
- Place some painter’s tape on the wall behind the baseplate to ensure you don’t accidentally sand the paint off the wall.
Warning: Make sure that the baseboard heater cover isn’t too damaged. If there is too much rust, then painting it will only hide the problem, but it may still deteriorate over time. In this case, it’s best to replace the cover completely. The average lifespan of a baseboard heater is about 20 years. If yours is older than that, don’t paint it, rather replace it.
If your baseboard heater needs to be replaced, a new one costs between $50 – $150. You may need to hire an electrician to install it, so that cost should also be taken into account. The cost of an electrician ranges between $65 – $130 per hour.
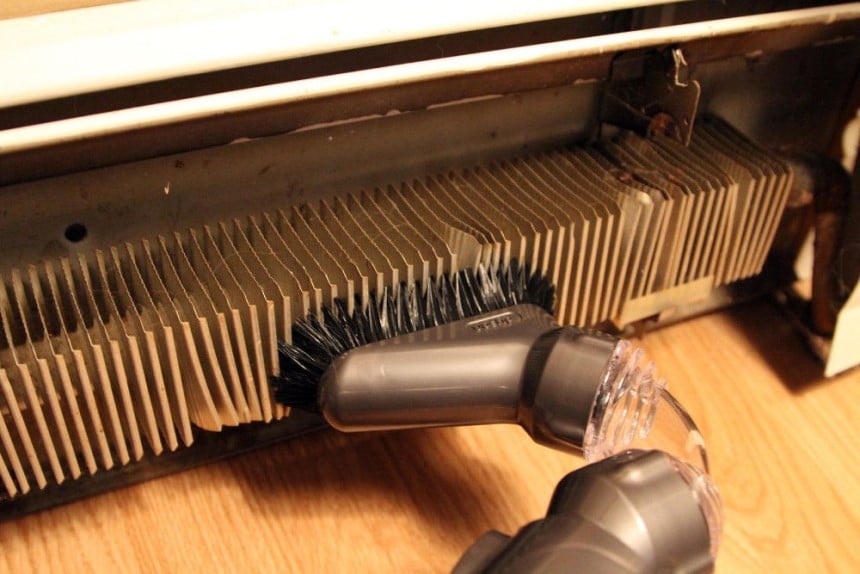
To keep your baseboard heater in perfect condition, it should be cleaned on a regular basis. Do this by turning off the power to the system and then wait until it has cooled down completely. Use a brush to remove any debris, then use a vacuum cleaner’s soft brush attachment to remove crumbs or other items that may have become stuck. Once it’s clean, allow it to dry before turning it back on.
Final thoughts
If you’re tired of staring at your ugly, rusty baseboard heaters, nothing is preventing you from changing the look. After reading this article, you should have all the knowledge you need for painting baseboard heaters. See? Hiding rust and other imperfections is much easier than you think.
A primer is your best friend when it comes to painting and will help you hide any painting errors, even if you aren’t the best at painting. Experts recommend an oil-based paint, but latex paint can also be used and is much easier to clean than its counterpart. Following safety precautions is essential. You should wear a mask while sanding and painting.
Keep the doors and windows open to let in as much fresh air as possible. Try to avoid breathing in the paint fumes and take breaks if necessary. Now, strap on your toolbelt, bring out your inner DIY expert, and get painting.