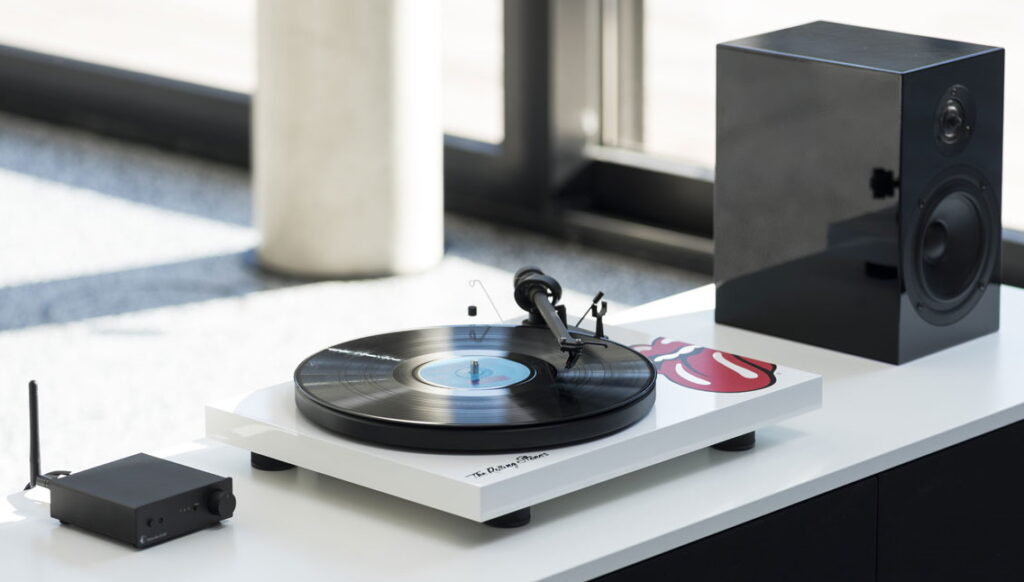
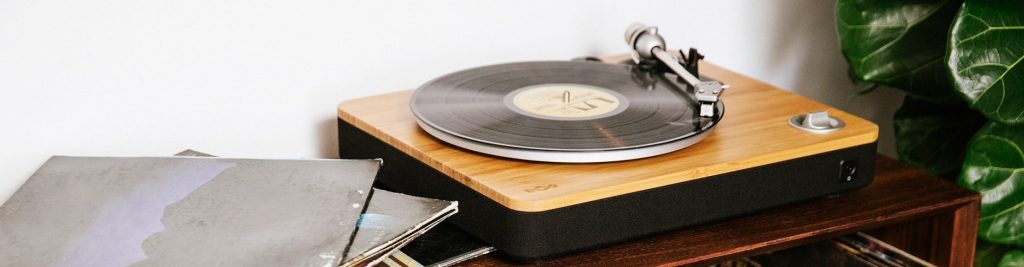
The return of the vinyl record and its popularity is often referred to as the “vinyl revival”. But, the vinyl revival is about a lot more than purchasing a record player. Maintaining the components that make up your record payer is key to ensuring that your records can be played properly and not damaged.
This includes knowing how to replace a needle on a record player. The needle, or stylus as it’s more commonly called these days, is an important component of the record player since it’s the only item that makes direct contact with the record. By moving along the grooves of the record’s vinyl surface, the needle reads the music.
Whether you’re just a nostalgic music lover Trusted Source Music and health - Harvard Health Researchers are exploring the many ways in which music may influence health, from stress relief to athletic performance. www.health.harvard.edu or a hip DJ with a love of vinyl, everyone can agree, maintaining your record player needle is important if you want to continue enjoying the music. Let’s have a look at all the factors you need to be aware of when it comes to replacing the needle on your record player.
Why you should change a record player needle
 Just because your stylus doesn’t look damaged, doesn’t mean it doesn’t need to be changed. Manufacturers recommend changing your stylus every 1000 hours of record playing time. Failure to change the needle could result in scratched records. Some of the other reasons the stylus might need replacing are listed below.
Sound is getting worse
If you haven’t been keeping track of the number of hours you’ve been using the stylus, the next best way to tell if it needs changing will be by listening to the sound. Simply listen to a record that you know to be in perfect working order. A clear and audible hiss or static sound is a clear indication that the needle may be faulty and need replacing.
Time
If you’ve purchased a second-hand record player, it’s a good idea to change the needle. You’ll most likely not know the age of the existing needle, how it has been used and whether or not it’s damaged. Changing the needle and the cartridge will prevent damage to your records. It’ll also be easier for you to keep track of the new needle’s usage.
Upgrade
You might be thinking it’s time to upgrade your turntable stylus. One of the more common options is the Audio-Technica ATN95E Replacement Stylus. Vinyl enthusiasts will adore the sonic accuracy of this nifty little replacement stylus. An elliptical diamond delivers fantastic tracking accuracy. Your favorite tunes will sound better than ever!
Know the parts
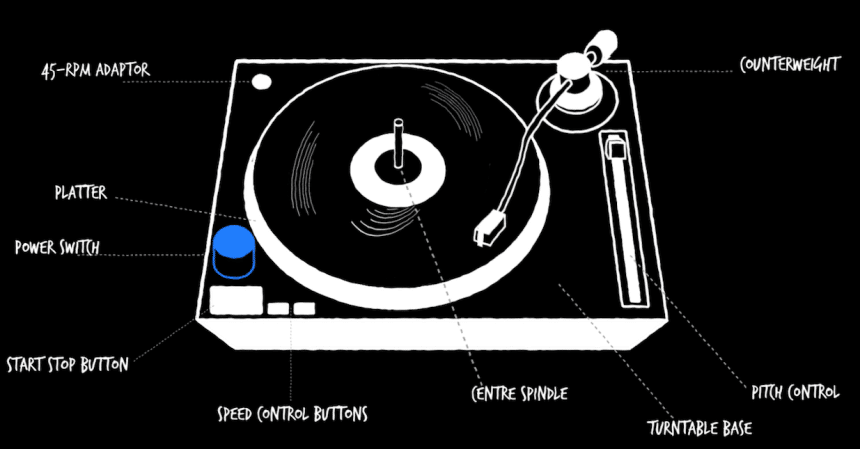 Before deciding on the best replacement stylus, it’s important to understand the parts that make up your turntable. The six most common parts of a turntable are listed below:
- Turntable: Refers to the part of the record player where the record rests. Ordinarily, turntable plates are made of plastic or metal which is then covered with a rubber mat. This mat protects the record from getting scratched. A metal rod in the center holds the record in place while it spins.
- Stylus: The stylus is the needle that rests on the record. It runs along the grooves while playing. Stylus tips are made from diamond and shaped into cones. Manufacturers use diamond and since it’s the hardest natural material, it doesn’t damage the actual record. Sapphires are a common alternative to diamonds in stylus manufacture.
- Tonearm: The tonearm holds the stylus and also connects it to the record player’s housing. Tonearm’s can be S-shaped, curved or straight. Many record enthusiasts prefer the curved shape because it provides better sound. DJ’s on the other hand prefer straight tonearms as they scratch better.
- Cartridge: The sounds you hear from a record are courtesy of the cartridge. The stylus reads the grooves and then the cartridge interprets these vibrations. Inside the cartridge magnetic coils transform the vibrations into electric signals. Ultimately those signals are sent through to the amplifiers and speakers.
- Pre-amplifier and amplifier: The various sound frequencies you hear, like bass and treble, are played through the speakers. The better your speakers are the clearer the sound will be.
Where does the needle snap into?
The needle, or stylus, is inserted into the tonearm grooves. This is done once the back of the cartridge is inserted by locating the needle at a slightly downward angle. When the back is installed, simply lift the front and snap the needle and cartridge into place.
Do you need a serial number to identify the part you need?
To ensure that you get the right part for your record player, you should have a part number or serial number. The more information you have regarding the desired part, the easier it’ll be to find it. The last thing you want is to spend money ordering the wrong part.
Types of stylus
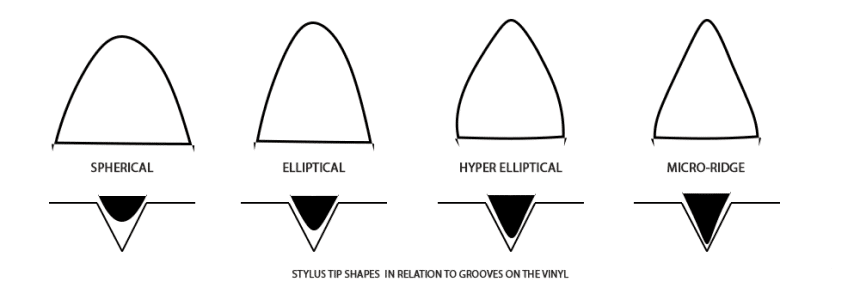
Not all record players use the same type of stylus. If you’re planning an upgrade, it’s important to make sure that the new stylus you’re considering is compatible with your record player. There are four common stylus types that you can use on your record player. Let’s look at each type in a little more detail.
 Spherical
 Spherical
A spherical stylus is generally the most common type also the least expensive. Up close it looks almost like the tip of a pen. This type of stylus also has quite a large radius and as a result, the contact area of the diamond tip is restricted to only two points, which some record lovers claim produces less wear on the actual vinyl.
Elliptical
The next type of stylus is known as an elliptical or bi-radial. Since this version makes contact across a much larger area of the vinyl’s groove wall, there’s more room for improved frequency response. This means lower distortion and improved phase response. This stylus will wear faster than a spherical one. A tip to note if you’re considering an upgrade to this unit is to keep your eye on the alignment of the tonearm if you want the best listening results.
Hyperelliptical
A few other names for the Hyperelliptical stylus are shibata, sterehedron, or fine line. It’s the next step in the elliptical evolution. With a sharper design, the stylus makes greater contact with each record groove.
When it’s aligned properly, this particular stylus will offer exceptional frequency performance, improved tracking, and promises a longer tip life. There’s also a reduction in record wear, meaning you can listen to your favorites as many times as you want without any damage. The advanced design makes them more expensive than the standard elliptical stylus.
Micro-ridge
The most advanced of all the stylus types is the micro-ridge or microline stylus as it’s sometimes referred to. This tip is computer designed and comes very close to the shape of the cutting stylus that’s used to manufacture master discs.
The multilevel ridge shape means the stylus can produce and most consistent high-frequency performance. If aligned properly, it also offers a much longer record and stylus durability. Since they’re so difficult to manufacture, they’re relatively expensive.
Instruments you’ll need
Quality record players and their components are very delicate. Changing the stylus and the cartridge is a delicate process and should be done with the utmost care. To change your cartridge you’ll need a flat-head screwdriver, stylus gauge as well as an alignment tool. Here are the brief descriptions of these tools.
- Flat-head screwdriver: Ensure you have the right size so as not to damage the screw heads.
- Stylus gauge: This is a handy tool used on turntables. A stylus gauge is used to determine the stylus tracking force. Tracking force defines the downward pressure applied by the tonearm’s weight through the stylus and onto the record.
- Alignment tool: A protractor-like alignment tool is used to align the cartridge.
Once you have the right tools on hand, our simple step by step guide will assist you with replacing the needle and the cartridge. I’ve listed the two processes separately to avoid any confusion. Follow the step appropriate to what you need to do: changing either the needle or the cartridge or both.
Step by step needle replacement process
 Unless you’re upgrading or replacing a broken cartridge, it’s more than likely that you’ll only need to know how to change a needle on a record player. These easy to follow steps will show you how:
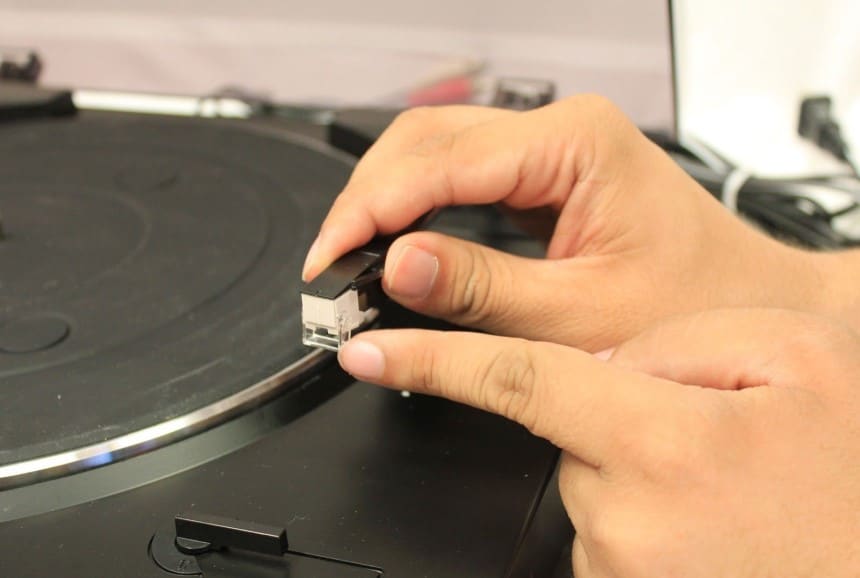
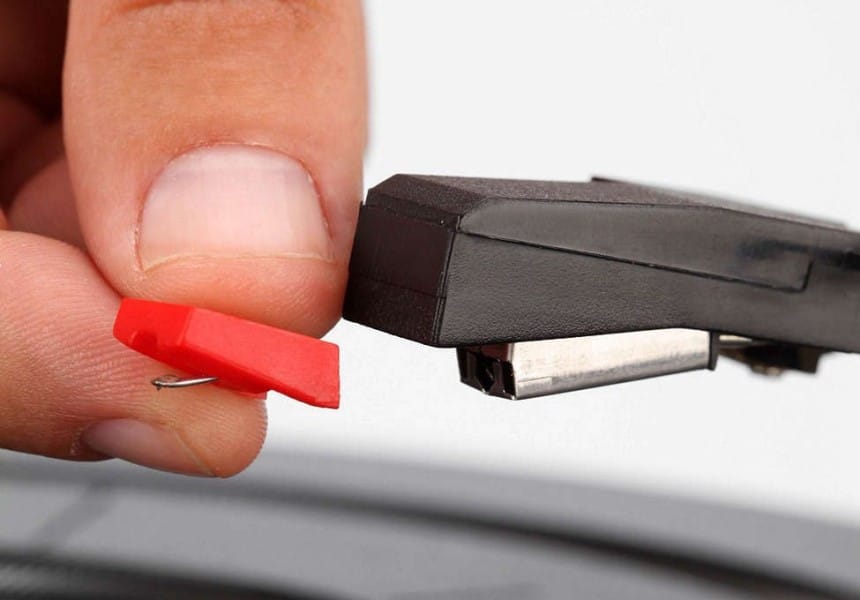
- Step 1: Ensure the record player is unplugged. Use your non-dominant hand to hold the tonearm still. Use your other hand to grip the plastic or metal casing that surrounds the stylus.
- Step 2: Pinch the sides of the cartridge and gently pull the old stylus out. Avoid damaging the cartridge by sliding the stylus away and keeping it parallel to the tonearm.
- Step 3: If you haven’t bought the new stylus at this point, you’ll see a series of letters or numbers on the stylus which will enable you to order the same model. If you’re upgrading, ensure that the new stylus is compatible with your record player.
- Step 4: When you’re ready to install the new stylus, then use your non-dominant hand to hold the headshell still to avoid moving the tonearm. Position your stylus with the needle pointing downward and away from the tonearm.
- Step 5: Gently slide the new stylus into the cartridge and press it into the designated slot until you hear a click sound. That means your new stylus is now completely in and you should be ready to listen to your records again.
From one music lover to another, here’s a tip for ensuring your needle doesn’t get damaged. Use thin rubber gloves when you replace the stylus. Avoid touching the needle since it’s already perfectly aligned when it comes out of the box. Touching it may impair the needle’s ability to track the grooves in your record. This will give you a static sound from the onset and that’s not what you want. Handling the new stylus as gently as possible is key to ensuring the process runs smoothly!
Step by step cartridge replacement process
 In most cases, the stylus will outlast the cartridge. This means the cartridge is only changed if it’s damaged. There isn’t a need to change a cartridge if it’s only the needle you want to replace. Changing your record player’s cartridge is simple enough to do on your own. Since the stylus is extremely fragile, it’s advised that you keep the stylus guard on throughout the installation process.
Follow the steps we’ve listed below:
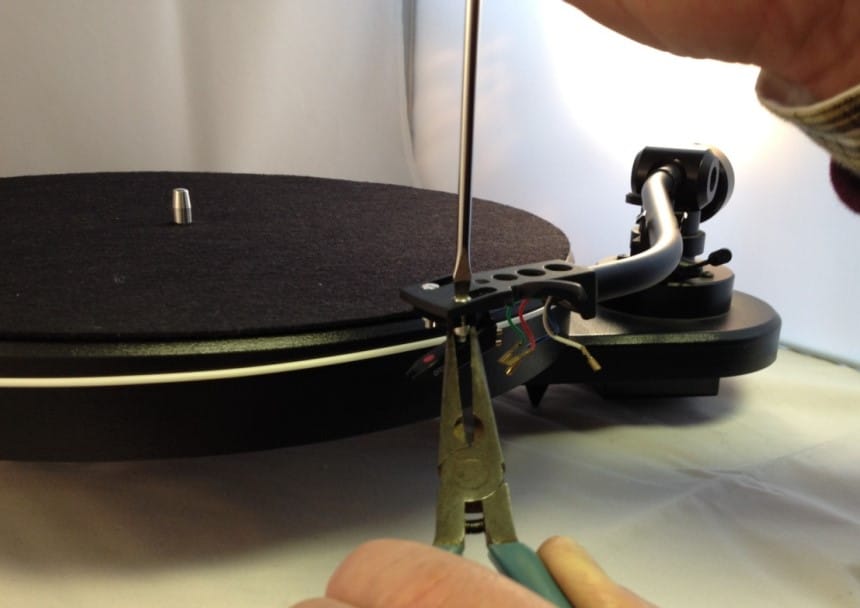
- Step 1: Loosen the headshell screws Trusted Source Headshell - Wikipedia A headshell is a head piece designed to be attached to the end of a turntable’s or record player’s tonearm, which holds the cartridge. en.wikipedia.org on your existing cartridge by using the flat-head screwdriver.
- Step 2: Gently unplug each of the tonearm wires. Ensure that you don’t pull on the wires directly as they may break. Rather hold the wires by their plastic sleeves.
- Step 3: Remove the new cartridge from its packaging. Attach the tonearm wires to their corresponding colored pins on the cartridge.
- Step 4: Insert the screws into the slots and then through the slots on the cartridge cover. Hold the headshell nut in place and turn the screw into place. Follow his process with the other screws. Don’t tighten the screws completely at this point.
- Step 5: Once the cartridge is mounted, use an alignment tool to ensure the cartridge is perfectly aligned. Adjust the cartridge if necessary. This can be done by adjusting the cartridge headshell slots.
- Step 6: Once the cartridge is aligned, tighten the screws.
Upgrading your cartridge
When it’s time to replace your cartridge, you might consider opting for a universal fit such as the Ortofon 2M. Not only is the Ortofon a multipurpose cartridge that provides clear, dynamic sound, it also features an impressive Elliptical diamond. Opting for a universal component will save you the hassle of searching for available stock. Do your research beforehand so that you can consider all your options.
Final thoughts
As you’ve seen from this article, replacing the needle on your record player is very easy if you follow the steps as I’ve laid them out. As long as the stylus you’re using is compatible with your record player and fits securely into the cartridge, you’ll have no problem changing the needle yourself. Ensuring you use the right tools, and working as gently as possible are also crucial to the process.
Once you learn how to replace a needle on a record player, you’ll be able to enjoy hours of listening to your favorite records. You won’t need to stress over any damage to your old and treasured vinyls!