Are you looking to weld? If so, you might be concerned about the type of welding that you should do. There are different popular welding processes. One of the common is stick or SMAW welding Trusted Source Shielded metal arc welding - Wikipedia Shielded metal arc welding (SMAW), also known as manual metal arc welding (MMA or MMAW), flux shielded arc welding or informally as stick welding, is a manual arc welding process that uses a consumable electrode covered with a flux to lay the weld. en.wikipedia.org . Along with MIG and TIG, it is one of the most recommended welding methods. Stick welding is relatively simple and is favored by many outdoor welders because it is not affected by the wind and some other external factors – unlike the other types of welding. In this post, we provide a comprehensive guide on how to stick weld.
At the end of this article, you should have enough information to help you stick weld with a minimum amount of fuss. Apart from showing you how to stick weld, we will also consider important advantages and downsides of this type of welding, as well as how to set up yourself for welding. Furthermore, we will look at steps to take if you have issues during welding.
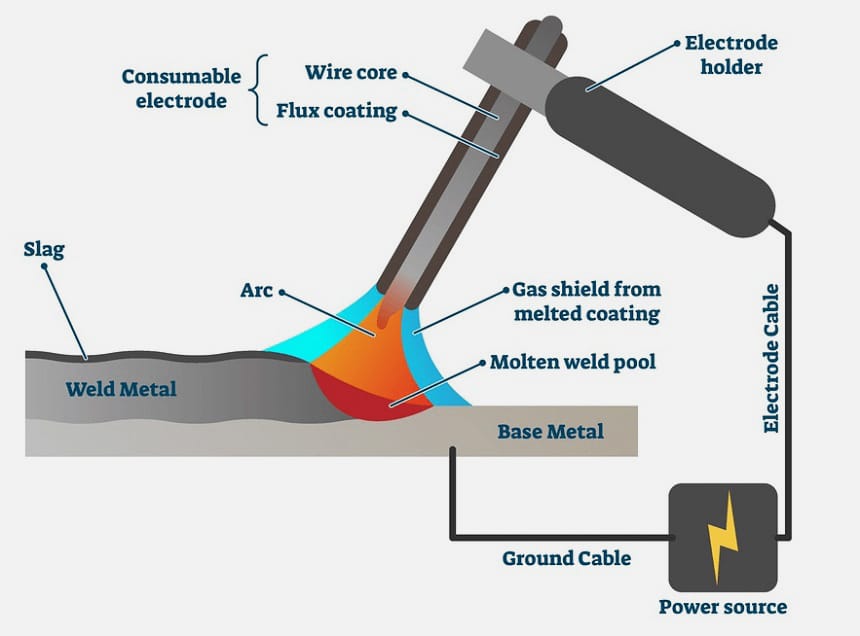
SMAW (Shielded Metal Arc Welding) or stick welding is an excellent welding process that is quite common with new and experienced welders. When the electrode is struck, this activity creates a current that passes through an electrode and the electrode is melted into the material you are working with.
The melted electrode is protected by a layer of flux, the effect of which is protection from contamination by the wind or other external factors. This layer of flux is similar to the shielding gas found in MIG and TIG welding.
Additionally, the flux layer created will in turn make a slag layer on the weld bead. Therefore, after you are through welding, you will have to chip this off and brush it away.
Now that we have considered the definition of stick welding, it is vital to know how it works. In this section, we consider the way this type of welding works.
In simple terms, stick welding works by using the current flow from your electric outlet and passing it through, first the electrode holder, then the ground clamp. The flow of electricity forms a closed circle that will help to melt the electrode and metal you are working with together.
So, if you want to use this welder, you need a power source. Then, connect the electrode holder and ground clamp to electricity. The polarity, which is dependent on the electrode will then go to work at helping you melt the electrode. Then, hook the ground clamp to the metal material you want to weld. Finally, put the electrode in a stick holder and begin the arc.
Starting the welders’ arc is not difficult. All that you need is to strike it similarly to how you’d strike a matchstick. Once struck, lift it off the ground and it will continue burning – just like the matchstick.
Electricity is obviously an important factor to consider. It passes through the rod to create the arc that can reach temperatures that exceed 6000 degrees Fahrenheit. Once this temperature is reached, the coating will melt and a shield formed to protect the process from contamination from the air.
One question that many beginners ask is whether stick welding is AC or DC supply. Well, that question is a good one and has a simple answer.
The power supply for your welder can either be AC, DC, or a combination of the two. What determines the supply? The model of welder that you are using will determine whether it is AC or DC. The two types of supply come with their advantages.
For example, DC supply is preferred, especially among new welders because of the smooth and stable welding arc. Also, DC supply lets you choose between a DC electrode positive or negative. With that choice offered, you can work on a variety of metals.
AC supply also has its advantages. With this type of supply, the current moves from positive to negative quickly. And every time this happens, the arc will go off and will restart.
One disadvantage of that is that you get less consistent results from your welding. You don’t face this issue when using the DC supply.
Does that mean AC is all bad? Of course not! One of the advantages of AC supply is seen when there is a relatively large distance between that electric outlet and the work area. When you face this situation, you have better resistance.
Another thing that you need to consider is the stick setting. You need to determine whether to use DCEP or DCEN.
In most cases, there is a pair of connectors on the welder – positive and negative. You need to connect the stick holder and ground clamp to these connectors. While that seems straightforward enough, you should note that the position you connect these parts will affect the positive and negative electrode.
Thus, if the stick holder is connected to the positive connector and the clamp to the negative connector, which means you are welding with DCEP. If the reverse connection is made, then you would be welding in DCEN. What does this mean for you?
Well, if the setup is in DCEP, which implies that the electrode will be positively charged. In that case, the current will move from the welding piece to the electrode. This connection provides more heat and penetration in the material you are working with.
For the DCEN setup, the current flows from the electrode to the welding piece. Thus, you will have less level of penetration and lower heat on the material you are welding.
If you have decided to carry out this form of welding, there are certain advantages that you will enjoy. In this section, we consider some of the biggest benefits of using this type of welding.
As with the other types of welding, there are some disadvantages to using this type of welding. Here are some of the cons of stick welding:
Before you begin, there are certain things that you need to have handy. In this section, we will review some of the most important things that you need to have before you can start stick welding.
Welding, even in the best of conditions, can be dangerous. Therefore, you need to have the correct equipment to remain safe. Before you even think about the equipment, you should have the instruction manual handy and read all the instructions there that will guide you on using the welder.
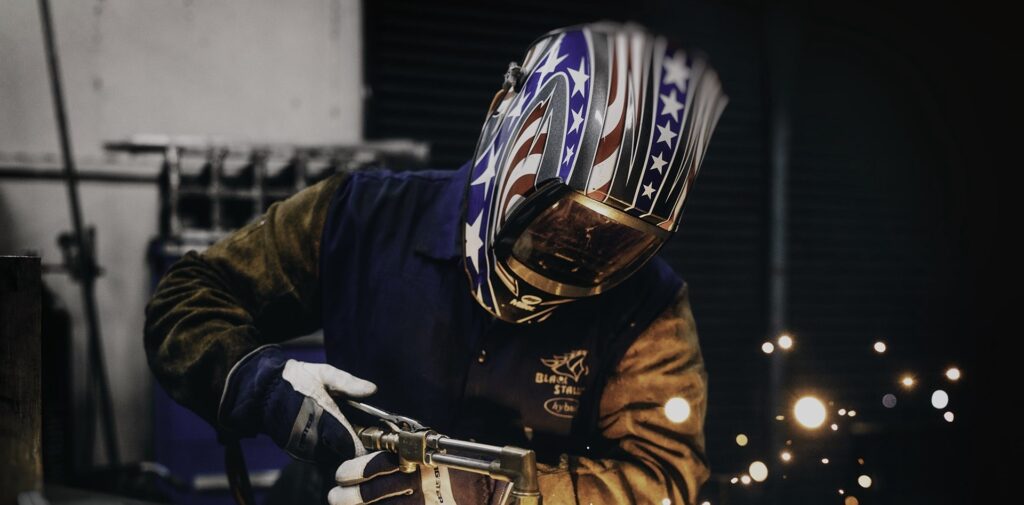
With welding, you will require body protection from heat, UV rays, sparks, and other things from the arc. To that end, part of what you will need includes fire-resistant clothing, glasses, and a helmet.
To ensure your safety and health, you should also only weld when there is the right ventilation. Otherwise, the fumes from welding might end up poisoning you.
In summary, here is the safety equipment that you need:
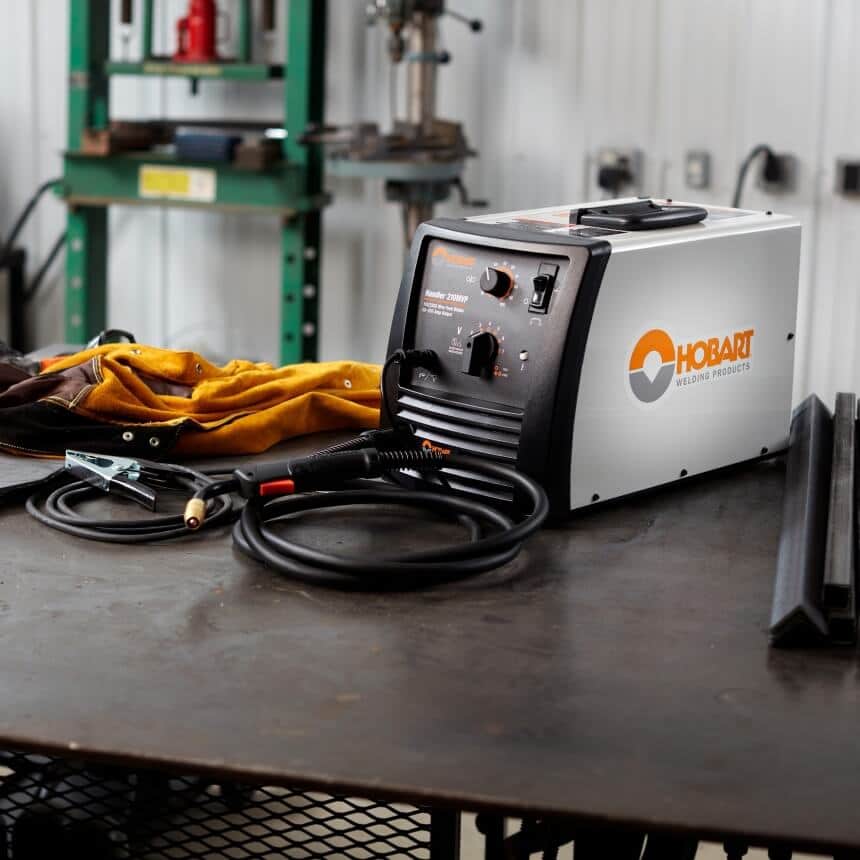
Apart from the safety equipment, you will also require a welder. After all, you cannot weld anything if you don’t have a stick welder. There are different models on the market. Some are single-use welders while others are more versatile and are marked as multi-purpose welders. With multi-purpose welders, you can carry out different types of welding including TIG, stick, and MIG welding. Weldpro makes some pretty decent multi-process welders, and their model is one of the best in this category. If you are on a budget, though, you will be best served by a stick-only model.
Reviews have highlighted the Hobart 500570 Stickmate as one of the best stick welders on the market today.
The next thing that you will require for stick welding is a ground clamp. Fortunately, this is often provided by the manufacturer and is found with the welder. The ground clamp is to be plugged into the welder and used to clamp the material to be worked on.
Stick welding is a messy process. After working, you need to remove all that slag and clean the mess. Well, a slag remover comes in handy in such cases. There are dedicated slag chips and hammers that will help you to remove the slag. Another tool for removing the slag is a wire brush.
Welding can be a dangerous endeavor if you don’t take the right precautions. The major thing that you must ensure is to wear PPE or protective equipment.
These equipment have been highlighted in the earlier section of the article.
Some of the most important equipment to have are the welding helmet, gloves, and overall.
From most indications, it is rather simple to use the stick welder. However, it can be a tricky process when it comes to choosing the electrode. Why? Well, there are hundreds of different types of electrodes for a stick welder on the market. Some of the most popular types of electrodes include 6010, 6011, 6012, 6013, 7018, and 7014. Thankfully, some tips can help you choose the right one.
Among these popular options will lie the best electrode for your project. Knowing the significance of the numbers here will assist you to choose the right one. Let’s see what these numbers mean.
The first two numbers indicate the minimum tensile strength. So, if you have an electrode 7018, that means that it has a tensile strength of 70,000 psi. To know whether it is right for you, the number has to be compatible with the base metal’s strength.
The third number is the best position of the electrode during welding. 1 means that you can use the electrode in any position. 2 means that you can only use the electrode in the flat position.
The last number refers to the current that the electrode can be used for and the type of coating on the electrode.
The purpose of this article is to show you how to stick weld. In this section, we provide in-depth consideration on how to do this. You must check, before anything, whether the polarity is compatible with the electrode. We will consider the importance of this later in this info article.
Also, before you go any further, you are advised to have some scrap metal handy to serve as a butt joint.
Although you still require plenty of skill to successfully stick weld, you can get it right. Before you begin on the main metal, lay a weld on a scrap of metal for practice. That will help you to get a sense of what you are about to do.
When stick welding, there are five key elements that you must consider. These include the arc length, the current, the electrode manipulation, the angle of the electrode, and the speed of movement.
To have the best quality weld from your work, you must ensure that it is properly prepared. This entails cleaning the piece before you. Although stick welding still works when your material is rusty, you still want to improve the quality by cleaning it appropriately.
How do you clean the workpiece? You do this by using a wire brush to remove the dirt and impurities on the body. This is vital because it will make your first pass nicer. If you fail to do this, your first weld might turn out badly. It can cause a lack of fusion and crack.
There are two main techniques used in stick welding, and each one offers unique advantages.
The techniques used for a flat position or an overhead position are referred to as drag. In this technique, you hold the electrode at 90 degrees to the joint from the beginning and then tilt the top by around 15 degrees in the direction you are moving.
If you are welding upward, then the forehand technique is the preferred technique of many experts. In this technique, the rod angle is tilted by 15 degrees from the direction of movement.
Getting a good body position is vital to getting either of these techniques right. With the right technique and angle, you will have neater results.
Another important thing to keep in mind is the current setting. This factor is vital for the type of metal you are working with and the electrode that you choose. The electrode used will determine whether you will set the machine to DC positive, negative, or AC.
As we pointed out earlier, positive electrodes are great if you want more penetration and heat. However, DC is better if you are working on thinner materials.
What if you don’t know the correct welding rod to use? In that case, consider what the manufacturer instructs. Check out the amperage depending on the electrode used. Adjust the welder gradually until you get the correct setting.
One thing about arc stick welding is that the length of the arc will depend on what you are doing and the electrode. To that end, the length should not be more than the diameter of the electrode’s core. If the arc is too long, you will have a messy result, including spatter, undercuts, reduced deposition rates, and more porous finishing.
If you are stick welding newly, you might think having a longer arc would be better, since it offers a better view of the puddle. But as you can see above, a longer arc is not necessarily a good thing. Therefore, you need to move your head into a better position. With the right position, you will notice that the bead looks better and there is a lower level of spatter.
To know how to correctly stick weld, you need to master manipulation and movement of the electrode. Every welder, though, has techniques that they use. If you are a beginner, you should closely consider the experts and try to copy their movement before you finally get that which works best for you.
Some of the movements used include whipping the rod, moving circularly, and weaving sideways. You could stick with moving in a straight line as well. And you should never weave sideways if the material is thicker than ¼”.
You also need to consider your speed of movement. If you want to maintain a good movement speed, then all you need to do is to keep the arc in the fore one-third of the weld pool.
If you don’t move quickly enough, you will create a wide, convex bead. Additionally, you will not have good penetration of the welded metal.
Moving too quickly can also result in issues. If you are too fast, you will have a narrow bead.
Stick welding is relatively easy to master. You can learn it within six months to one year.
Below is a video with quick tips for beginner stick welders.
As a beginner, you are bound to make mistakes while welding and encounter certain difficulties. If you do, this troubleshooting section can assist you. Some of the most common mistakes made by newbies include having an arc that is too long, using a poor drag angle, welding too quickly or slowly, and welding at the wrong temperature. If you face these or other issues, here is how to get better.
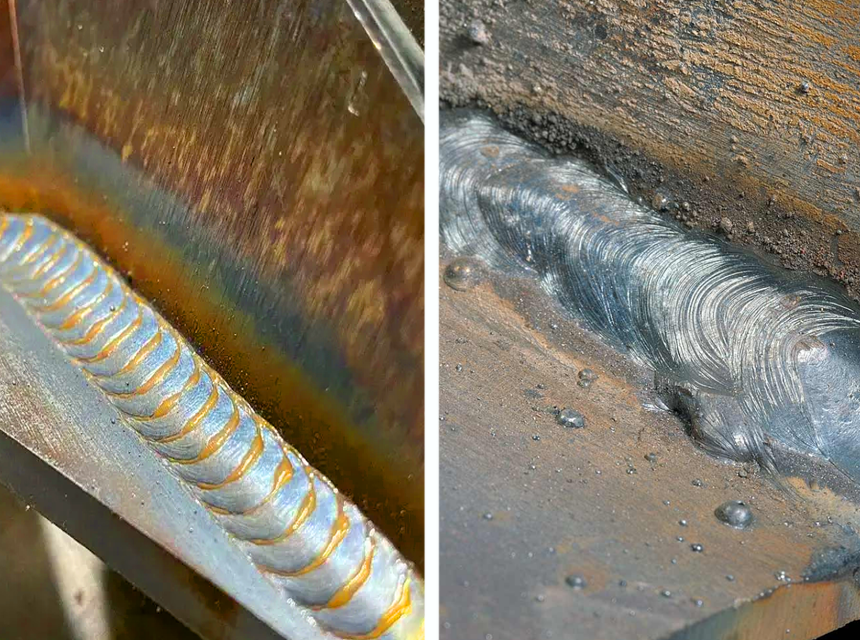
There are different reasons for spatter during welding. One of the reasons for spatter is an arc that is too long. When welding, we recommend that the electrode be held slightly above the metal you are working on. If the metal is too far, the arc will lose focus and will be unstable. This will lead to a jagged finish instead of the smooth finish you might want.
If you have adjusted the height of the electrode and you still have this problem, then you should look at the amperage. It might be too high and needs to be reduced.
Another issue that you might face is porosity. One of the major reasons for this problem is a poor electrode angle. If your welding angle is too steep, then your finished work will likely suffer from porosity.
You should therefore angle the electrode in a way that there is no slag at the back of the weld pool. If you don’t pull back your electrode at the right angle, then this slag will interfere with the weld pool and cause a porous finish.
Having an undercut in your work refers to the presence of a depression at the toe of the weld between the weld and the material plate. The major disadvantage of this problem is that it makes your weld brittle and much weaker.
So how can you solve this problem?
You can do so by reducing the amperage of the electrode.
Your weld bead should be 2 ½ times the diameter of your electrode. If it is smaller than this, then chances are very high that the weld will not penetrate correctly. If you suffer from this problem, there is a solution.
To solve the problem of a thin weld bead, reduce your speed by half. That should make the problem go away.
If your beads are lumpy, then that is likely because you are moving too slowly. Also, if the amperage is too low, there will be poor penetration and the filler metal would just lie on top of your joint.
If your arc refuses to start, that is likely because the arc is too cold. This will cause a weak arc. To solve this problem, increase the amps. That should get it started.
If you have the problem of a wet electrode, the solution is to change the electrodes with dry electrodes. To stop this from happening again, you should keep all your electrodes in a heated location.
If the weld doesn’t fuse properly, then you have improper fusion. To eliminate this problem, increase the current and clean the joint. If that doesn’t work, then you should change your welding technique.
Cracking is one of the more common problems associated with stick welding. If you face this problem, it is likely because of high carbon, alloy, or sulfur content. Thus, look for electrodes that have a lower content of these compounds.
Whether you are new to stick welding or have been doing it for a while now, here are some tips that can help you get better and get better results from your work.
One of the most important things that you need to do is to choose the current setting. This setting is dependent on the type of electrode you are using for the welding. Before you set the current, ensure it is the correct one for the work on hand.
If penetration is important to you, then a positive electrode is better. On the other hand, a negative electrode is best for thin metals.
For high rates of deposit, high electrodes at high currents are the best bet. Therefore, to get consistent results, use the biggest size practical. If you are welding sheet metal, though, you need to be careful as that can cause a burn.
Next, consider the length of the arc. This is something that every stick welder needs to keep in mind. Depending on the application and the type of electrode used, you will need a different arc length.
As we have pointed out, there are different welding positions, and these have different techniques for moving the electrode. For vertical welding, you will likely use the push technique. If you are a beginner, the flat and horizontal positions are likely your best options since they employ the simple drag method.
Before you start welding, another thing that you must do is to remove any impurities on the welder and the parts that will form the flux pool. This helps you to get the best speed of movement. It also ensures that other problems like porosity and brittleness don’t come up.
[vc_tta_accordion][vc_tta_section title=”What is the cost of stick welding?” tab_id=”1617082499321-5bf26d87-4b24″]
Just like all other machines on the market, there is no fixed price since there are many models with different features. Thus, the price will be different based on different things. It will depend on your goal of welding, and of course, your budget. If you have basic welding requirements, then you don’t need to buy the most expensive welders. You can get a simple stick welder. If you do opt for a budget option, you need to keep in mind other things like the warranty, the ease of repairs, and so on.
[/vc_tta_section][vc_tta_section title=”How much power does a stick welder need?” tab_id=”1617082660782-7bcfcb1e-65c0″]
With enough expertise, you can weld at 150 Amps. You can also use this amount of power for more intensive projects with multiple passes. However, you need to be skilled to make multiple passes and do so correctly. Thus, consider the welding chart and determine the maximum thickness that your welder can handle.
[/vc_tta_section][vc_tta_section title=”Can you hold the stick during welding?” tab_id=”1617082671345-f2a4ae59-af68″]Yes, you can hold the stick as you weld. However, that is not without its dangers. For one, you run the chance of being electrocuted or even burned! Therefore, you should wear protective gloves as you weld.[/vc_tta_section][vc_tta_section title=”Is a stick welder push or pull?” tab_id=”1617082669910-30890e92-ac2f”]For the welding stick, the best thing is to pull. Pulling has several advantages, including helping to reduce slag. Most experts push when MIG welding.[/vc_tta_section][vc_tta_section title=”Is stick welding difficult?” tab_id=”1617082668368-e54402d2-900f”]If you are a beginner, you might find it a tad difficult. However, it is still simpler to learn than some of the other types of welding.[/vc_tta_section][/vc_tta_accordion]
Whether you are a beginner or an expert, this in-depth guide on how to stick weld will help you. By following the tips and tricks here, you will be on the right path to making excellent welds. Ensure that you wear correct protective equipment, clean your welder and metals, and use the right electrodes and techniques for the job. Happy welding!

