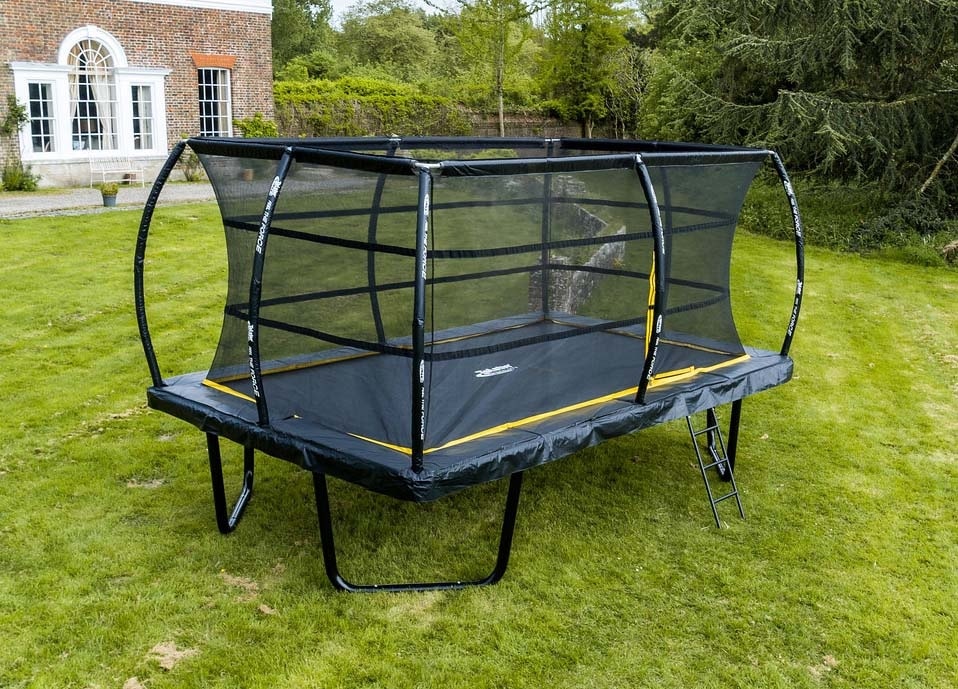
A trampoline is one of the best fun lawn accessories that can offer both adults and kids the best entertainment. Everyone would love to have a trampoline in their backyard. However, many people dread the installation. Most manufacturers offer trampoline assembly services, but you would have to part with a hefty amount. If you are a budget-conscious person, you can assemble the trampoline yourself. You can use an extra pair of hands or take your time and DIY.
This article will help you understand the trampoline assembly process. The step-by-step installation process applies to the most common types of trampolines, including the round outdoor trampoline. You will need some tools, accessories, and energy to complete the project. Luckily, the assembly tools usually come with the purchase. Read on for quick tips that will help you hack the installation in the shortest time possible.
What You Will Need to Assemble a Trampoline
Before you begin the assembly process, you have to prepare yourself well. Preparation begins with assembling everything you will need for the trampoline assembly process. First off, unbox your trampoline and review all the materials to ensure you have all the tools and parts required.
Lay out all the parts and tools on the flat ground. The organization will give you an easier time finding the parts and tools during the assembly.
Without the right tools, trampoline assembly can be quite a hassle. Fortunately, nearly all manufacturers provide the basic assembly tools. You may need more tools and accessories for more convenience. The assembly tools provided by trampoline manufacturers include;
- Spring tool
- Rubber mallets
- Screwdrivers: If you are not satisfied with the screwdriver provided by the manufacturer, consider the highly acclaimed Klein tools 32500 11-in-1 screwdriver. Its ergonomic handle offers a comfortable cushioned grip, and it comes with eight industrial heat-treated bits.
The extra tools and accessories you should get include;
- Working gloves: the Ironclad General Utility Work Gloves are among the best-rated work gloves on the market. They have a unique design that offers maximum hand safety and comfort.
- Power drill
- A wrench set
After gathering everything, you need for the trampoline assembly, go through the installation process on the user manual to have a better understanding. Many manufacturers provide straightforward instructions; insportline Trusted Source Trampoline User Manual Before you begin to use this trampoline, you must read all the information in this manual. www.insportline.eu is a perfect example. After reading the instructions, keep the manual as it will come in handy when you need to replace a part on the trampoline.
The last preparation step is to get a friend or two to lend you a hand in the entire process. Do not let kids come near the assembly until the process is finished.
What Usually Comes with a Purchase
When you unpack your trampoline, you should find the following;
- Trampoline spring cover and padding
- 4 to 6 enclosure poles depending on the trampoline’s size
- Enclosure net
- Anchoring strings and accessories
- 4 to 6 trampoline frame, T-sockets, and legs depending on the trampoline’s size
If one of these parts is missing in the trampoline package, contact the manufacturer to send you the part or replace the trampoline.
If you are looking to buy a trampoline but are completely green about the type, design, and size, check out our detailed articles about the best trampoline, best rectangular trampoline, and the best trampoline for gymnastics to make the best-informed choice.
Step-by-Step Trampoline Installation Guide
You have all the tools, accessories, parts, and a friend to lend you a hand; let’s get on with the assembly process.
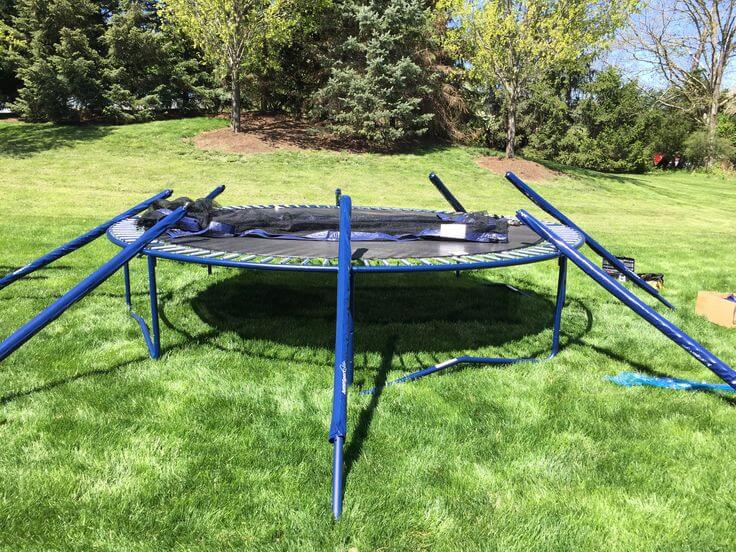
Step 1: Assemble the Trampoline Frame
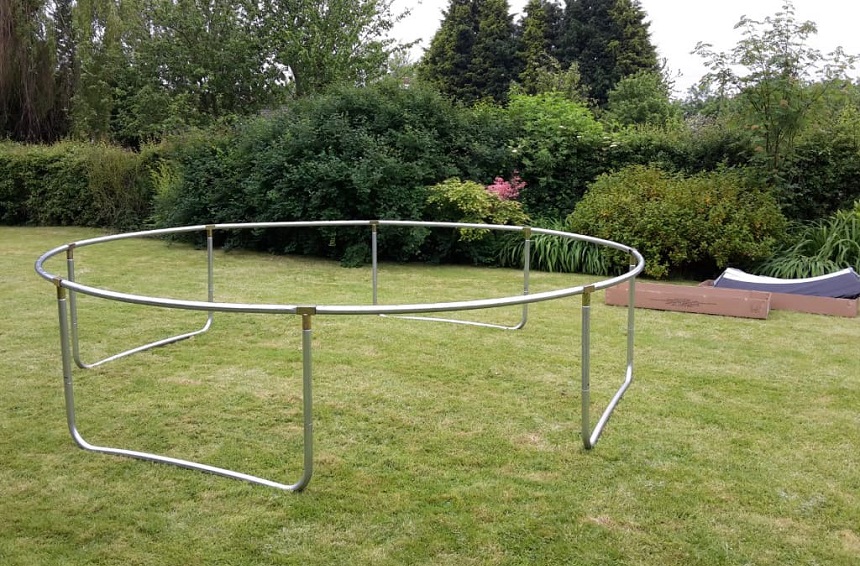
Ensure there is enough space to build up the frame, then set its parts on the ground. Connect all the T-sections with the frame parts. Push one piece into another until you have a complete circular or rectangular ring. The ring is like the trampoline’s foundation. You can add other parts to it gradually.
Once you have a complete ring foundation, you can begin to add the legs. The ring has spots on which you can attach the legs. Attach each leg to the T-sections that you added earlier. Fitting the legs on the ring should be a breeze. If you find it challenging, grab the rubber mallet and use it to line up the holes.
Screw up the legs and T-joints together with a screwdriver. If you want the process to be faster and easier, use a power drill. Ensure you tighten all the screws properly for the frame to be sturdy.
Step 2: Install the Springs and Mat
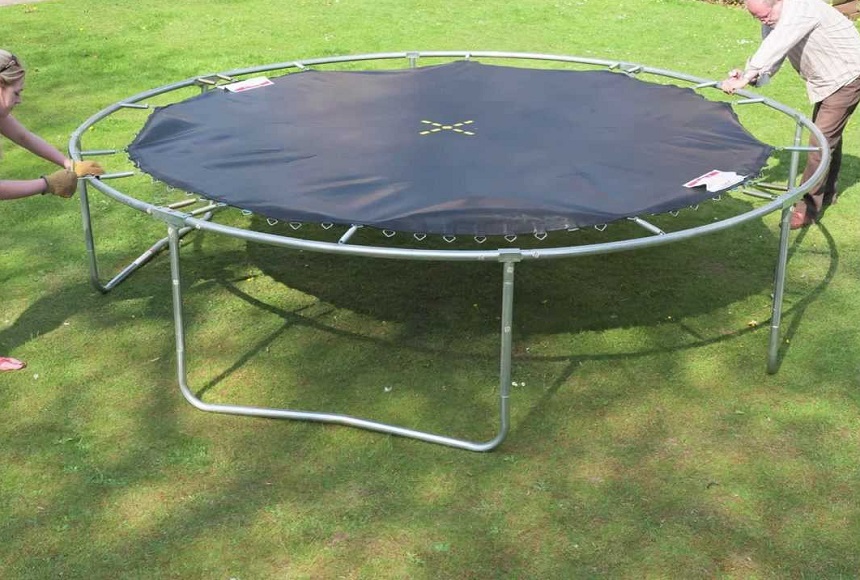
This is the trickiest bit of the entire installation. Most trampoline users are usually unsure about springs and mat installation. Which one should go first? The two are supposed to be added to the trampoline foundation together.
To install the springs, pick one spring and attach one of its sides to the mat and another side to the frame. Repeat the same procedure to attach another spring on the opposite side of the first one. The third spring should go in at 90 degrees of the first two, and the fourth on its opposite side. These first four springs lay the foundation before attaching others with the mat and the frame.
Installing springs requires some good strength. Use a spring tool or spring puller to pull the springs and the rubber mallet to hit and snap them into the right place. Installing the springs by alternating them on the opposite sides helps to balance the tension, giving you an easier time.
Step 3: Add the Protective Trampoline Pad
The protective trampoline pad protects acts as a protective barrier between the user and the springs. According to an article by Washington Post, Trusted Source Trampolines make you want to jump, but may not be safe - The Washington Post Jumping on a trampoline may seem like a great way to exercise and have fun, but a new report from a group of pediatricians (kids’ doctors) warns that it may not be safe. houseandbeyond.org a trampoline, although fun to jump on and exercise, poses a big safety risk to both kids and adults. The protective parts play a huge safety role. It offers a comfortable cushioned padding that reduces the risks of spring-landing injuries. The pad goes through the enclosure poles and you can fasten it on the frame with the Velcro or straps it comes with.
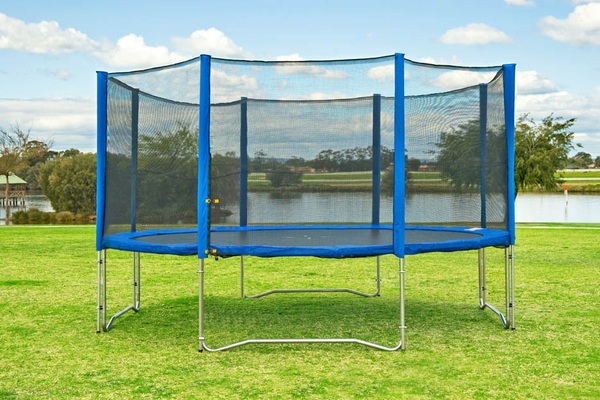
Step 4: Add the Safety Net
Virtually all outdoor trampolines feature a safety net that acts as a guard against falling outside. Here is how to install a safety net and thread the trampoline net.
First off, install the net poles. The trampoline net poles usually act as the frame for the enclosure net. You can easily snap the net poles into customized frame holes before securing them with screws. The protective trampoline pad we discussed in the step above covers the poles and protects users from getting hurt.
After successfully installing the net poles, you need to attach the net to them. Thread the net to the trampoline steel rods, then fasten the strings or bungee loops on the net at the frame’s bottom. Use the strings provided to tie the net’s top to the posts.
If you are lucky, your trampoline will come with an already fixed net, so you wouldn’t have to worry about this step.
Step 5: Add the Trampoline Ladder
A trampoline ladder usually has 3 or 4 steps that allow the user to access and leave the trampoline easily. You have to secure the ladder with hooks before setting it on the trampoline.
Step 6: Secure the Trampoline with an Anchor Kit
An anchor kit is an essential accessory that protects the trampoline from getting blown away by the wind. According to WikiHow Trusted Source Best Ways to Anchor a Trampoline - wikiHow Securing a trampoline against strong winds and big bounces is a simple project that can be done in a matter of minutes using a trampoline anchor kit. Tap U-shaped wind stakes into place over the legs of the trampoline for a quick fix, or… www.wikihow.com , an anchor kit will ensure your trampoline remains put even in the worst weather. It secures the trampoline to the ground. All you have to do is insert the anchorage in the ground, then fasten the anchor kit on it.
The video below contains the instructions on how to set up a round trampoline.
How Long Does It Take to Assemble a Trampoline?
Your kids will be up your neck constantly asking you how long it takes to assemble a trampoline because they cannot wait to jump on it. The amount of time needed to assemble a trampoline depends on its type, size, and the skills of whoever is putting it together.
An experienced professional assembler will only take 3 to 5 hours to assemble a medium-size trampoline, and less than an hour for a small-sized one. You may be a bit slower and take up to seven hours assembling a medium-sized trampoline.
How Much Do Trampoline Assembly Services Cost?
The cost of assembling a trampoline depends on its size and design. A professional assembler can charge you anything between $100 and $250.
Final Thoughts
Trampoline assembly is not a walk in the park, but it is doable if you follow the step-by-step guide in this article keenly. The procedure applies to nearly all types of spring-based outdoor trampolines. Other types of trampolines like in-ground trampolines, water trampolines, and spring-less trampolines all have different installation processes. Read this article by Skyline Trusted Source 10 Different Types of Trampolines - Skyline Trampolines Trampoline exercises are convenient and enjoyable. It is a way to boost your cardiovascular health, relieve stress, and improve endurance. The trampoline is a modern invention with an interesting history that takes in World War II, circus and the Olympics, and even NASA. skylinetrampolines.com to know the various types of trampolines. Remember to read the manufacturer’s installation instructions on the user manual to get a good grip of what you need to do.
If you don’t see yourself hacking the assembly, get a professional to do it for you. The downside is you will have to part with some good chunk of money, and you won’t get the experience under your belt. If you can assemble your trampoline, you can easily disassemble it for storage during summer and winter or when you are moving houses.