Sewing is an interesting pastime or hobby for millions of people around the globe. There are so many things that you can do with the nifty sewing machine. Since it is so popular, it is no surprise that numerous brands on the market make sewing machines. One of such brands is the Singer brand Trusted Source Singer Corporation - Wikipedia Singer Corporation is an American manufacturer of consumer sewing machines, first established as I. M. Singer & Co. in 1851 by Isaac M. Singer with New York lawyer Edward C. Clark. It is based in La Vergne, Tennessee, near Nashville. en.wikipedia.org . If you have recently purchased a machine from this brand, you might wonder how to thread it. In this post, we will teach you how to thread Singer sewing machine.
You might suppose it is a hard task; however, with the right equipment and instructions, you can do this pretty easily. You do not even need any special skills before you can set it up. In this post, we will share how to thread the machine, and in the end, this should give you a pretty good idea about how to thread yours.
Threading the Machine
 Are you looking to thread your Singer sewing machine? This tutorial will help you know all the things that you need to do. Without good help, threading your machine can be hard. It is tricky for experts, but doubly so for beginners. Although most sewing machines have basic things that tie them together in terms of threading, if you lack experience, you might find it nearly impossible to thread the Singer.
When looking to thread this machine, there are different places where you can find useful instructions. Instructions are always found in the user manual of the machine. You can also find it in the quick-start guide of the machine, and even some of our favorite models have threading instructions right on the body of the machine. The Singer 7258 sewing machine is one of the best sewing machines due to its push-button stitch selection. It offers the optimum setting for your tension and other requirements.
However, it might still be hard to make sense of all the diagrams in the instructions. That is what this post is for. Here we will help you to see an easy, systematic way of setting up the threading on your sewing machine.
Here, we will highlight how to thread some of the latest models from the manufacturer, and as you might also own an older model, we will consider how to thread an older model.
Some of what we will cover here includes instructions on threading the upper thread, winding the bobbin, and setting up the bobbin in different fashions. We will also consider how you can raise the bobbin.
Winding the Bobbin
 The bobbin is arguably the most important part of the machine that you need to thread. If you are looking to thread the Singer, then the very first thing that you must do is to wind the bobbin of the machine. The bobbin is designed to lie on the top of the machine. Before you start to wind it, the bobbin that you have must be compatible with your machine. Check out the model of the bobbin and the machine to know whether it is a compatible option.
If you see that it is compatible, then you are good to go. Let’s now consider the systematic way of winding the bobbin.
Step 1
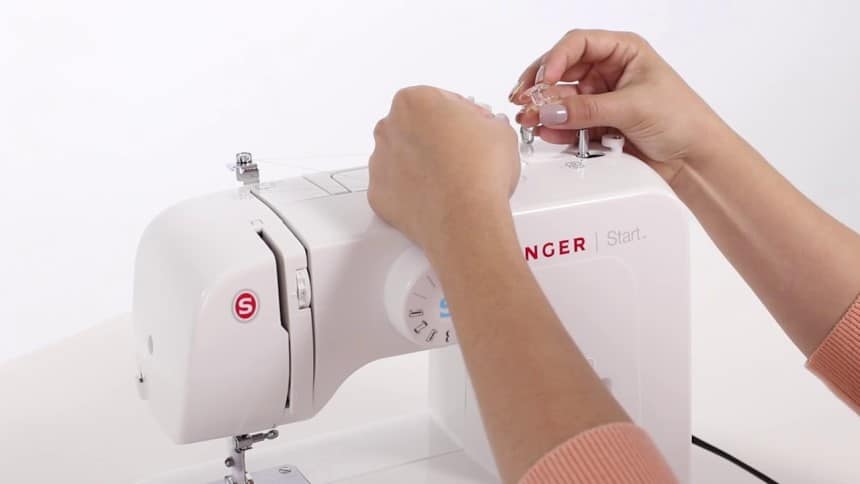
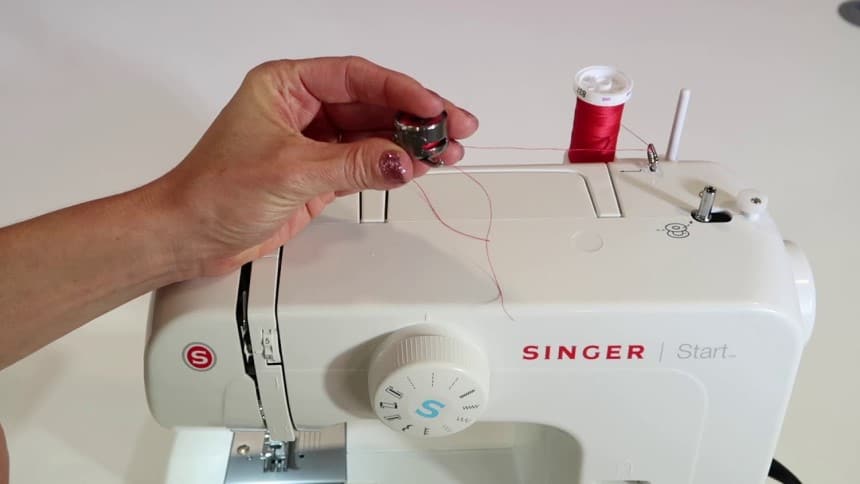
After you have confirmed that it is a compatible model, the first thing that you should do is to set the thread on the spool pin. Users recommend KEIMIZ sewing thread kits as the best sewing machine thread with pre-wound bobbins. They are specially made for your machines and for hand sewing too. There are things that you should also look out for when you are doing this. For one, you should check the position of the spool pin. It can come as a vertical or horizontal option.
So, if the spool pin lies horizontally, you will require a spool cap on it to prevent the thread from unraveling as you sew. On the other hand, if the spool pin found on the model is vertical, you don’t have to bother too much about placing a cap. You can choose to place it or not.
Some machines come with a spool pin felt. If the model that you have falls into this category, then you have the choice to place it beneath the thread spool. However, this is not compulsory. You might still choose to jettison it.
Step 2
After you have done step 1, then it is time for something else. The next thing to do is to pull the end of the thread and pass through the first thread guide. This is very similar to different models, so you don’t have to worry about not identifying it.
Step 3
After passing the thread through the guide, then you should wind the thread anti-clockwise around the tension disc. The disc looks just as described. It is a small, round piece of metal on the machine. When carrying out this step, there are certain things that you ought to keep an eye on. For one, when winding the thread, you should ensure that the thread passes through the disc. It should give a small pop when threaded.
Fortunately, as we have pointed out, several of the good models found on the market come with diagrammatic instructions on how to carry out this next step.
Step 4
Winding the bobbin has different parts to it. The next thing that you ought to do is to place the thread and pass it through the small circle that lies on the top of the bobbin. There is a bobbin spindle, and you are expected to place the bobbin there. You will see the importance of doing this when sewing. You will observe that it will prevent the bobbin from moving loosely as you sew.
Step 5
Next, adjust the bobbin spindle to the right. Here is when you need to use the foot controller. So, hold one end of the thread and press the foot controller. If the machine you have is a computerized option, then instead of stepping on the foot controller, you can use the start button.
When you do this, you should observe the thread winding around the bobbin a couple of times. When this is done, you can let go of the thread’s end, and you might even decide to cut the oose thread.
Step 6
This is the last step to take. Here, you need to fully press the foot pedal and wind the bobbin. When almost full, the bobbin will reduce its spinning. When you observe that, then stop pressing on the pedal, or in the case of a computerized model, just press the Stop button.
Once you have done this, push the spool pin back to the left and cut the thread’s end. Detach the bobbin from the pin.
Inserting the Bobbin
Another thing that you must do is to insert the bobbin on the machine. This is what you do after you have wound the bobbin.
After winding the bobbin, insert it into the machine.
To do this successfully, there are certain things that you have to keep in mind.
Although there are numerous Singer sewing machines, you will only find two types of bobbins on most of them.
The two types of bobbins found here are the top load bobbin and the front load bobbin. If your model is a mechanical option, and basic, then chances are pretty high that it comes with a front-load bobbin.
Regardless of the type of bobbin that you have, you can find it easy to install, as long as you follow the instructions that are provided in this article.
What to Do for Both Types of Bobbins
Whether you have a front-load bobbin or a top load bobbin, there are basic things to do that will help you to set it up and insert it.
Step 1
Whether it is a front load or top load, the first thing to do is stop the machine, switch it off, and then raise the needle to the highest point.
You might wonder how you can raise the needle. Well, the needle is raised using the handwheel or the needle up button. Keep in mind that the ‘Needle Up’ is only found in motorized models.
Step 2
The next thing to do is to raise the presser foot.
Installing the Front Load Bobbin
 As we said, there are two main types of bobbins found in the Singer sewing machine. In this section, we will consider how you can install your front load bobbin on the machine.
Step 1
The first thing to do is to remove the accessories compartment extension table on the machine. Then you should open the hinged cover.
Step 2
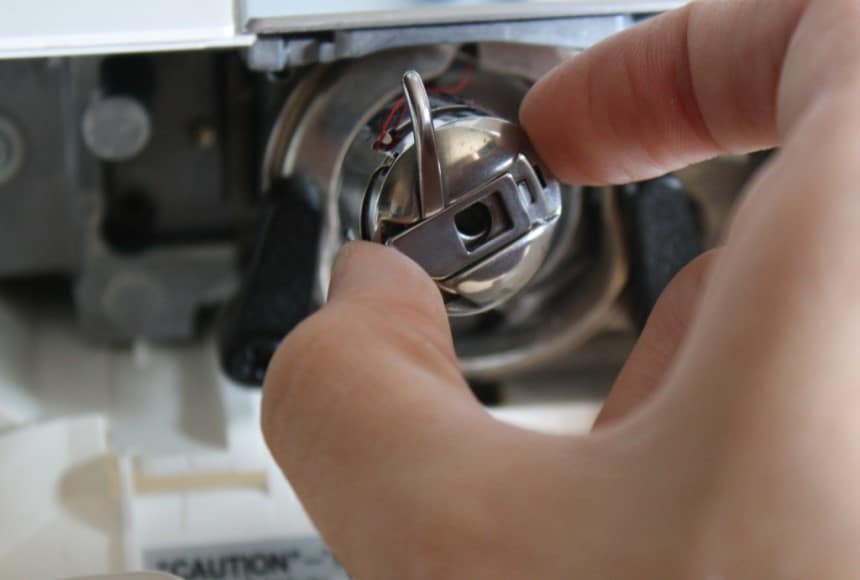
You will notice that there is a small tab on the front of your bobbin’s case. The next thing that you should do is to pull this in your direction and remove the case of the bobbin.
Step 3
After removing the bobbin from the case, hold the bobbin in an L shape. The L shape on the bobbin should be on your left. This is referred to as the bobbin finger.
Step 4
Ensure that the thread in your other head is oriented in a clockwise direction, and this is important because it is the end of this thread that will be in the opposite direction of where you will be installing the bobbin. After you have oriented that, then insert the thread into the bobbin case.
Step 5
Take the thread and pull it through the small hole that lies in the side of the case, then bring the thread out of the other end. As you do this, ensure that you have some inches of thread to use outside the bobbin case.
Step 6
Open the tab on the bobbin case and return it to the shuttle of the machine. Remember that when you are installing the bobbin, you have to ensure that it is pushed far enough before you decide to release it. When done properly, the bobbin will stay in place all through your sewing.
Installing the Top Load Bobbin
 When compared to the front load bobbins, the top load bobbins are easy to set up. You can get it set up in a jiffy. Here are the steps to take to set it up successfully.
Step 1
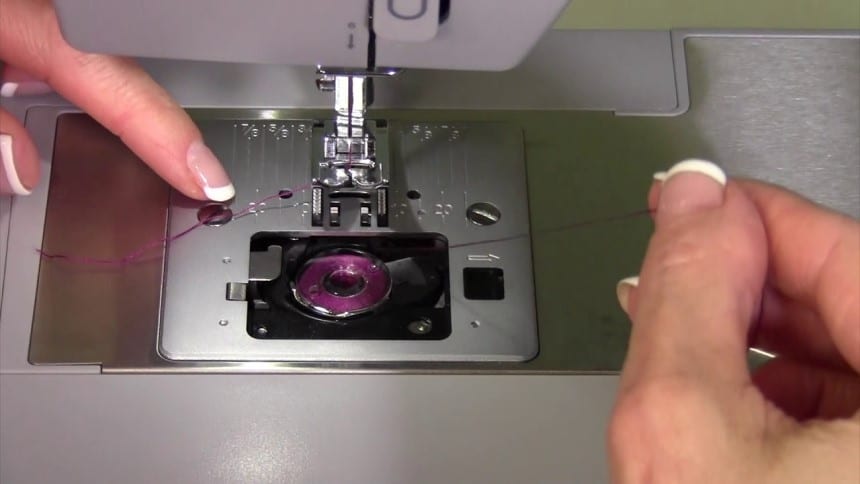
Open the bobbin cover and drop it in the bobbin. To get the correct position, ensure that when you pull the thread, the bobbin spins anticlockwise. Once that is done, you have successfully begun installing the top load bobbin.
Step 2
The next thing to do is pull the thread through the hole in the bottom of the case and pull it into a U-shape. Then, pull it behind the foot and replace the case cover.
Threading the Top of the Machine
Once you have managed to set up the bobbin, then you have to thread the machine’s top thread. In this section, we will consider the steps that you should take to accomplish this.
Step 1
Switch off the machine, and ensure the following: the needle still lies in the highest position, and the thread still stays on the spool pin. If you haven’t, you must raise the presser foot of the machine. Why? If you do not do this, then the tension of the machine would be negatively affected and this will affect the quality of your stitching.
Step 2
Take the thread and pass it around the second thread guide on the machine. Then pull the thread inside the wire needle clap guide that lies at the top of the machine. Then, thread the needle in a way that is similar to how you’d thread by hand.
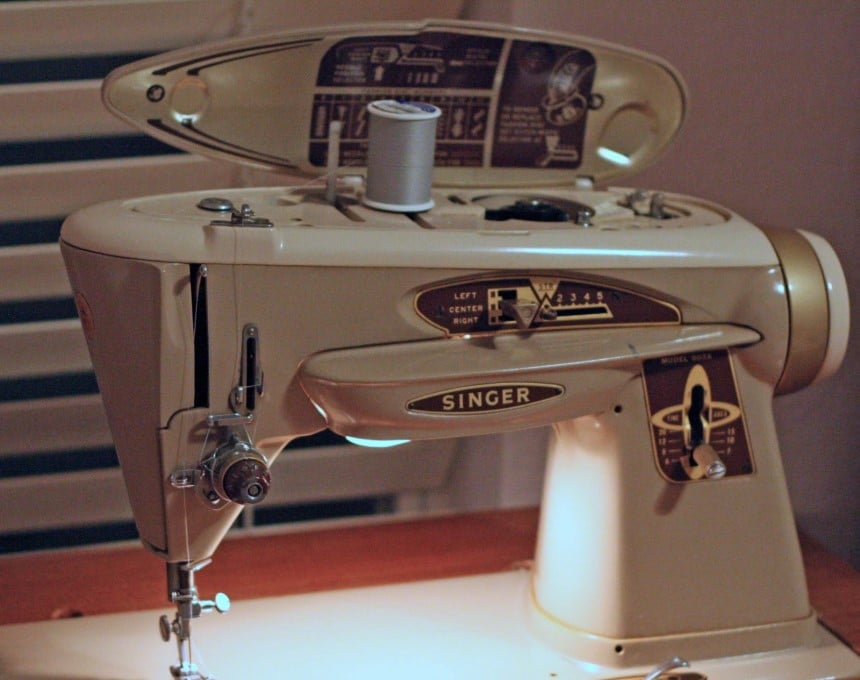
Threading an Older Singer Sewing machine
The first thing that you should keep in mind is that sewing machine might look the same, but they all use the same principles. Therefore, the thread moves from the spool on the spool holder, passes the tensioning springs, and then passes through the eye of the needle.
So, if you have an older Singer model, you don’t have to fret about threading it. Here are the things to do.
 Step 1
 Step 1
Put the spool on the pin
Step 2
Turn the balance wheel to adjust the needle assemble. You are aiming to have it in the middle or as high as possible.
Step 3
Pull the thread from the spool and pass it through the hook on the thread guide.
Step 4
Next, pull your thread down and roll it in the tensioner once, then pass it through the tension spring.
Step 5
After passing it through the tension spring, run the thread under the take-up lever until it reaches the second thread guide. Follow the previous instructions to run it through this guide and angle it to the needle.
Step 6
Lastly, pass the thread through the needle’s eye. According to most reviews, the Schmetz machine needles are the best needles for sewing. They are versatile and can be used with so many different machines.
So, that is how to thread an older Singer sewing machine.
Final Thoughts
Without the right instructions and help, you might find it difficult to thread the machine. Use this guide on how to thread Singer sewing machine to set up your machine. Happy sewing!