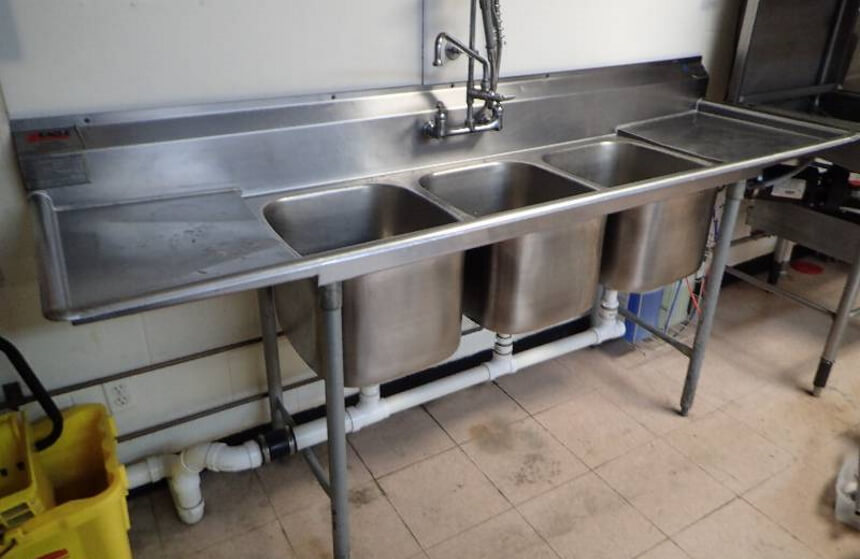
While one and two-bowl sinks are the most common, a three-bowl sink may look new to most people. In the foodservice industry, if you’ve walked into a kitchen where food is prepared for public consumption, then you’ve likely seen at least one three-compartment sink. These stainless steel sinks are typically wide pieces of equipment with drainboards mounted at each end and three individual side-by-side sinks in the middle.
Today, we will see the installation procedures and show you different 3-compartment sink plumbing diagrams that can serve as a layout. You may think that the three sinks are simply there to give more space for washing dirty dishes, but food safety regulations require that all three compartments be used for different purposes. Knowing the proper procedure will help you run a safe cooking operation.
How to Install a Three-Compartment Sink
Installing a three-compartment sink correctly is not only essential for your comfort, but safety, ecological sustainability, and for the sake of regulations surrounding this procedure. In this section, we’ll see the tools needed and the steps to installing a three-compartment sink.
Tools and Materials You’ll Need
 Below is the list of tools and materials you should keep at hand to install a three-compartment sink:
Materials Needed
- A three-compartment sink kit
- Drainpipes and fittings
- An under-sink water filter (optional)
- PVC cement
Tools Needed
- A hacksaw
- Putty knife
- Utility knife
- Safety glasses
- Pipe wrench
- Socket wrench
- Sandpaper
- Tape measure
- Screwdriver
- Adjustable wrenches
Plumbing Diagram
The diagram below is an administrative rule according to the
Illinois General Assembly
Trusted Source
Illinois General Assembly Home Page
Home page for the Illinois General Assembly
www.ilga.gov
on how a typical three-compartment sink system should look like. As you can see with the diagram below, a 3-compartment sink shouldn’t be hard to install and it works just like most sinks. There’s even the possibility of installing an under-sink garbage disposal.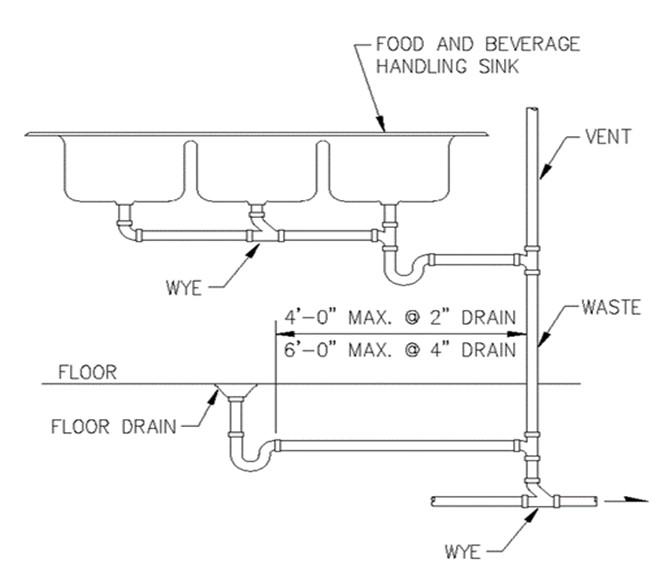
Source: ILGA Trusted Source www.ilga.gov
And here is an air gap 3-compartment sink plumbing diagram:
Step-by-Step Guide Plumbing Guide
Below are specific steps on how to plumb a 3-compartment sink.
Step 1: Separate the Pieces
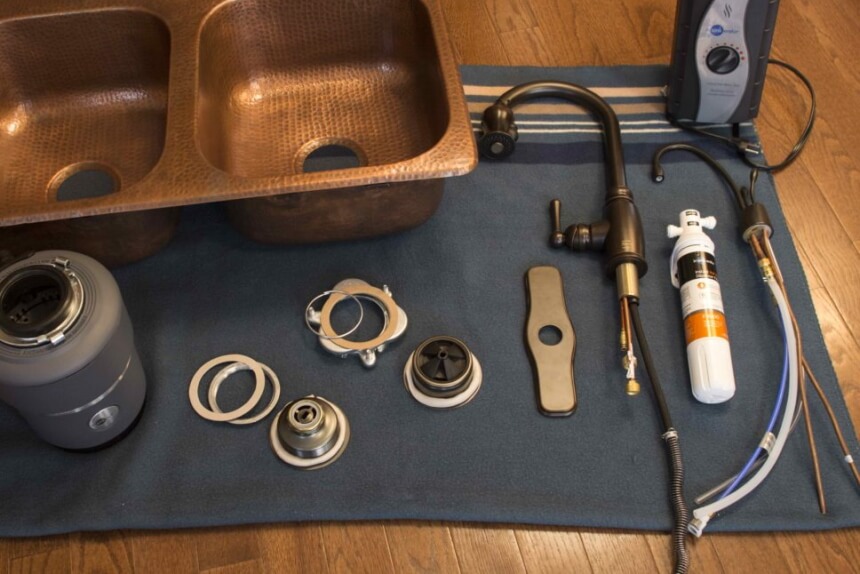
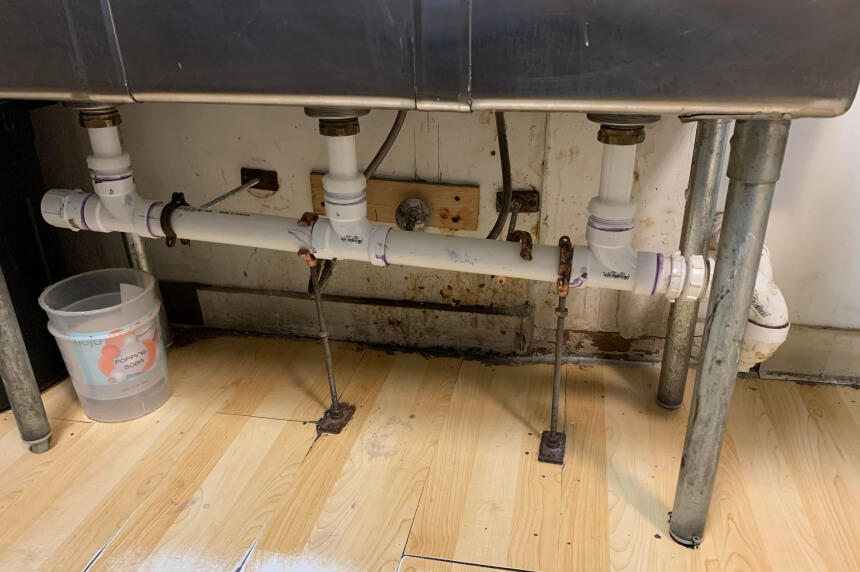
Set aside each piece of your three-compartment sink’s kit. The kit includes a center tee, drain tailpiece, and elbow pieces. The elbow component connects the left and right bowls. Meanwhile, the included center tee basically connects your center drain to the two-drain tailpieces. Meanwhile, commercial sinks like the KoolMore 36″ Three Compartment Sink are perhaps the easiest to install. They only need to be mounted to the wall, connected to the P-trap and fittings. However, this kit doesn’t include a P-trap for connection to the waste drain. For that, professional plumbers recommend the EasyDrain Ref. 510 P-trap. It’s expandable and flexible, measuring a diameter of one and a half inches.
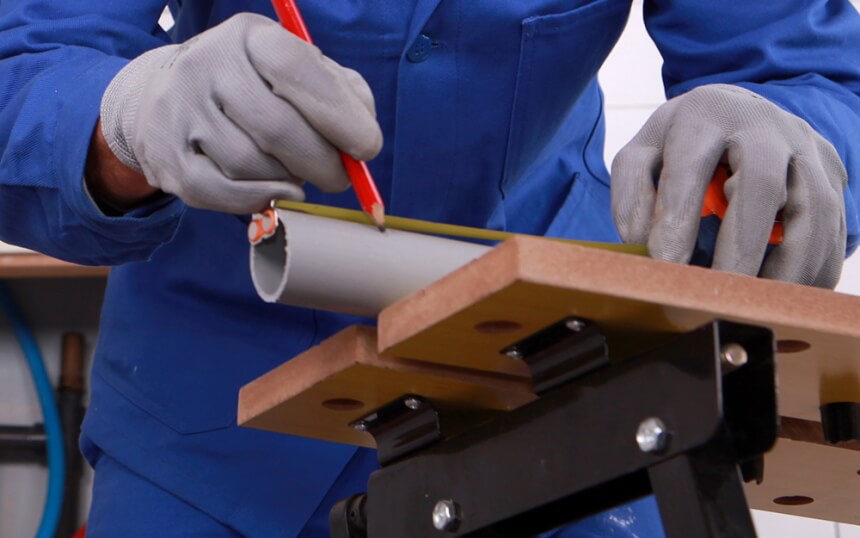
Step 2: Mark Areas to Be Cut
Fix the sink drain in place with its tailpiece coming from the drain. You will have to attach the P-trap to the element. Make sure to join the PVC extension pipe in the end run of this P-trap.
Gently move this P-trap with this extension till it meets the drain tube. Mark the areas to be trimmed on the two pipes. Cut the drainage pipe from the areas you marked with a hacksaw. Then remove the remaining burrs with sandpaper.
Step 3: Cut the PVC Pieces
 When you cut the PVC components, make sure they match the areas you marked. Then, do a full check of your wall. Find out the location of the drain. You probably wouldn’t need any additional parts to put in the drains of the center assembly. This is because it can be installed directly onto the p-trap.
In case of back drains, set up a p-trap. Follow this with a flexible pipe extension. This will drain the water beyond the wall. The drain has to be flexible. This will ensure it bends and will be lined up with your wall outlet.
Step 4: Install the P-trap with Sanitary Tee
 Place the tee and let the sweep face upward and its socket pointed toward your P-trap. Ensure the socket is the same dimensions as the expansion pipe. Secure this tee to your drainage pipe using PVC cement. Then connect the extension and the T-pipe.
Now, you can install the p-trap in the lower part of the central tail, ensuring it is aligned with your wall. When needed, you may use tailpiece extensions in the underside of your sink drain.
Step 5: Check for Leaks
When there’s a need for them, you can insert tailpiece extensions into the underside of your sink drain. Check for leaks and be sure to tighten all connections.
Installing a 3-Compartment Commercial Sink
Below is the guide on plumbing a three-compartment sink in a food truck.
Installing a Three-Bowl Sink in Your Garage
If you’re the type who doesn’t like a cluttered house, it is possible to install a three-bowl sink in a garage. Installing it in your garage means you don’t have to get your carpet or floor dirty. The following steps will appropriately direct you on the installation procedure of a three-bowl sink in your garage.
Step 1: Get the Pipes Prepared
Make sure to turn off the pipeline. Measure and then mark your drain as well as the hot water pipe and cold water pipe. This may allow you cut some of them so as to fit into Y-shaped and T-shaped connectors/fittings.
Step 2: Connect the P-trap
Cut the kitchen sink drain with a hacksaw. You can cut your water line with a pipe cutter. This is because they are mostly made of aluminum or copper. You’ll need primer and glue on the PVC drain tube to secure it to your Y-fitting.
Connect your p-trap into the drain hose of your Y-fitting to connect it to a sink. Melt any solder found between the tees with the aluminum piping with a blow torch, solder, and soldering iron.
Step 3: Install the Sink
 Put your sink under the newly installed PVC trap. Secure pipes that are connecting the sink with the trap with a compression nut. Remember to attach your flexible hoses onto the underside of the faucets. This lets cold and hot water move freely over the assembly.
Step 4: Check Your Water Connections
Secure the elastic pads in the T-connectors of hot and cold water. Then check if all connections are secure. Next, turn your water valve so as to check whether the whole sink is installed well and it’s working.
If you find any leaks, shut the water off. Then check if any fittings are not tight. Tighten all loose links. By now, you should be able to use your three-compartment sink.
Things to Consider Before Installation
Make sure to turn off the pipeline to prevent water from wasting. It is very important to place your sink near hot and cold water pipes and where there is sufficient drainage.
The first step in plumbing your 3-compartment sink would be planning the route of this pipe. Begin the preparations by leading a large waste pipe located about 2 inches below the floor from the main waste pile into the cabinet housing the sink.
Make sure this is the shortest path possible before removing the floor to install your pipe. Once you have finished laying the hose to the cupboard housing your three-compartment sink, you will then need to extend the hose to approximately 13 centimeters below the sink.
Final Thoughts
A three-compartment sink is a basic requirement in homes, public spaces, and in several restaurants. Knowing how to couple a 3-compartment sink plumbing for your kitchen or restaurant is very important.
As you can see from our 3-compartment sink plumbing diagram, the plumbing varies depending on the design and configurations of this sink. By getting the plumbing right, having the right components, and some plumbing expertise, you are going to be able to do it.